
This article will help you understand how to issue manual invoices and these for the receipts.
Issuing a manual invoice
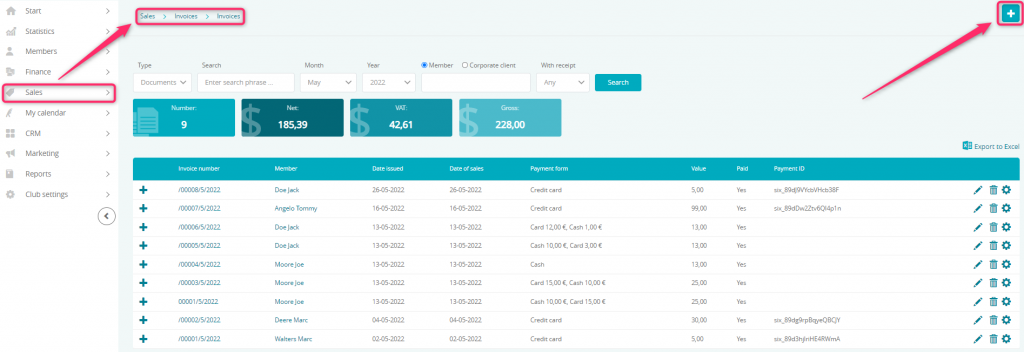
1. Go to the Sales -> Invoices -> Invoices tab.
2. Click the plus icon in the top right corner:
3. Fill in the form:
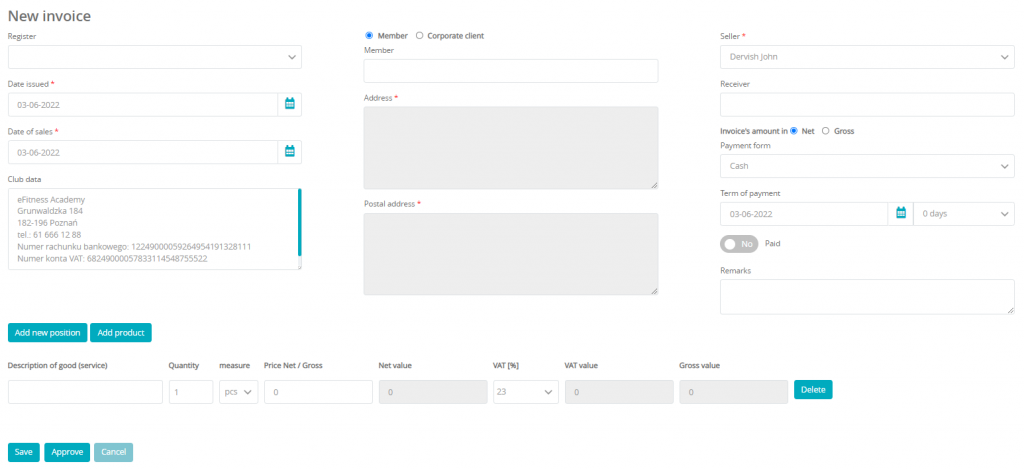
Fields not marked with a star are not required.
Available fields:
- Register – lets you choose an additional register that will be added to the invoice’s numeration. The register can be defined in Club settings -> Configuration -> Finance -> Register
- Date issued – lets you define the date of issuing the invoice. The date cannot be earlier than the date of the last invoice
- Date of sales – lets you define the date of sales or the date of performing a service. The date can be earlier than the date of issue
- Club data – club’s data is filled-in by default. You can add your tax number or a logo to your invoices by going to the Club settings -> Configuration -> Finance. Additionally, you can define the bank account number there
- Member or Corporate client – select a member or a company for which an invoice will be issued
- Address and Postal address – these fields are defined automatically once the customer has been chosen
- Seller – select the employee who performed the sale
- Receiver – in here, you can define a person authorized to receive the invoice
- Invoice amount in Net or Gross – select the applicable amount
- Payment form – select a payment method from the dropdown menu
- Term of payment – lets you define the date due and how many days does one have to pay for the invoice: 0, 7, 14 or 21 days
- Paid – change to Yes if you have already received payment
- Remarks – lets you enter additional information that are not already present in the invoice
- Add new position – this option will add a new position to the invoice and will let you define its name, price, amount and the tax rate
- Add product – this option will add a new line to the invoice in which you will be able to enter an item from your bar module
- Save – you can save the invoice allowing you to come back to it later and still be able to edit it. If you save an invoice, you will not be able to issue a second one until the previous one is approved
- Approve – approve the invoice if all the data entered is correct. Once approved, no changes are possible
- Cancel – lets you cancel the invoice without adding it to the register
Issuing an invoice to a receipt without tax number
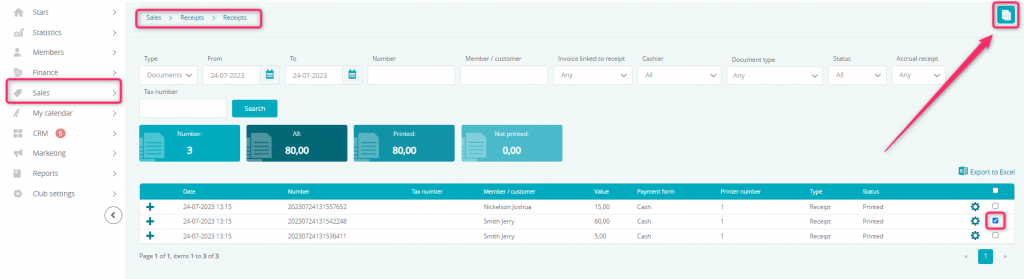
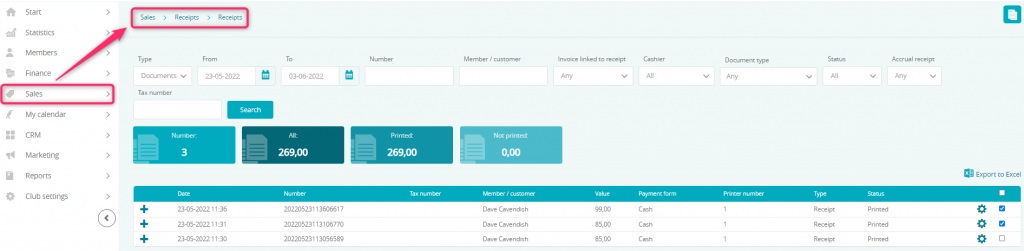
1. Switch to the Sales -> Receipts -> Receipts tab.
2. Choose a receipt, to which you would like to issue an invoice, by marking it with the checkbox visible on the right side. You can mark more than one receipt at once.
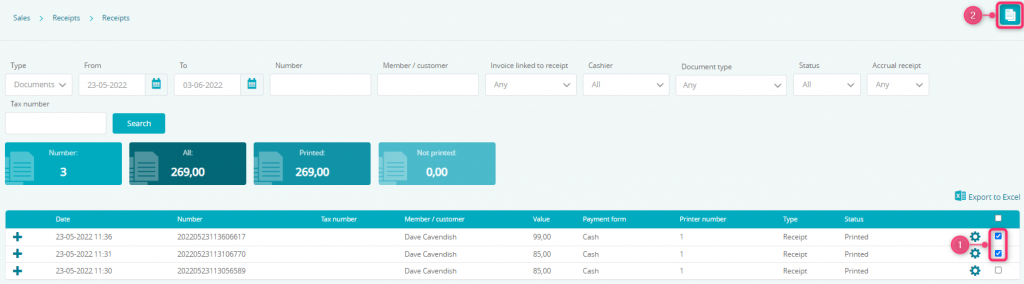
3. Click on the New invoice button in the upper right corner:
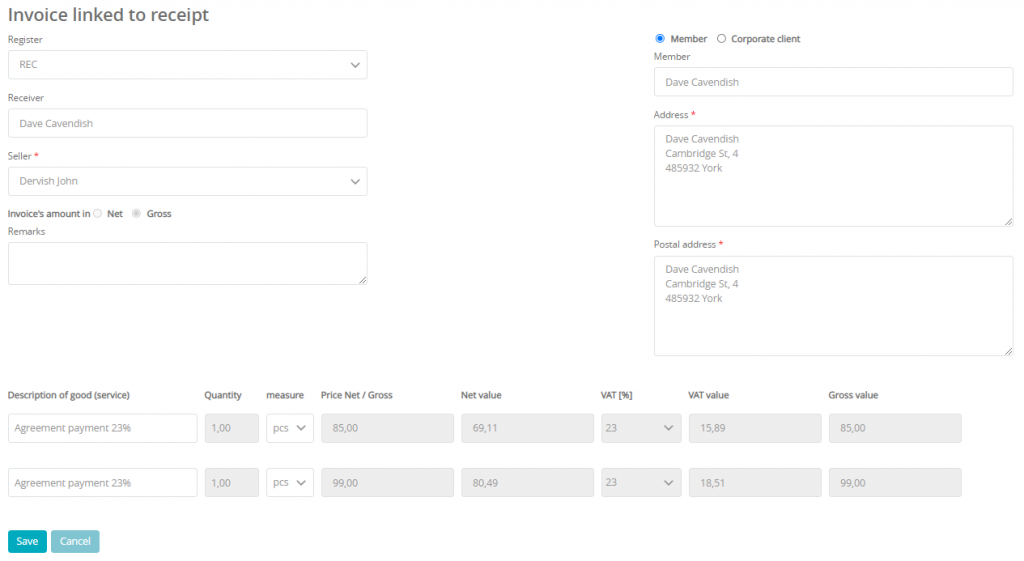
4. A form will be shown:
The following fields:
- Receiver
- Seler
- Member/Corporate client
- Address
- Postal address
will be filled in automatically, based on the data from the member’s profile.
Only exception is a situation when we will be issuing an invoice to the receipt for a retail sale, where no member’s profile is assigned.
Item or service name will be filled according to the description and values from the receipt.
5. Save the data provided.
Issuing an invoice for receipts
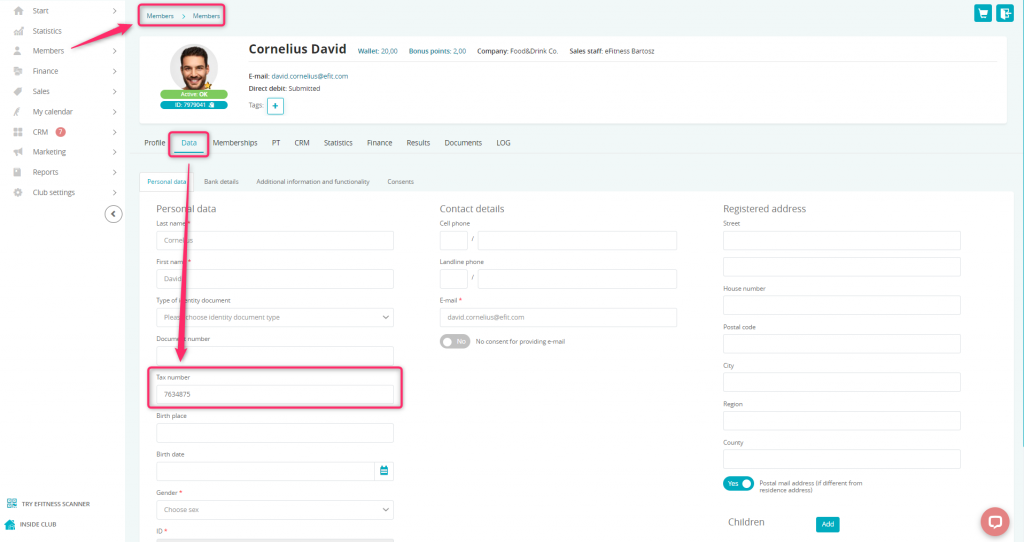
1. At first, before the sale process, assign the tax number to the member’s profile. In order to do so, switch to the Members -> Members tab -> enter a member’s profile -> Data -> Tax number -> Save.
Another way to assign the tax number to the member’s profile is to connect the profile with a company. Define a new company in the system, according to the following instruction. Next, switch to the member’s profile -> Data -> Additional information and functionality tab. Here, use the Company field to assign previously created company to the profile.
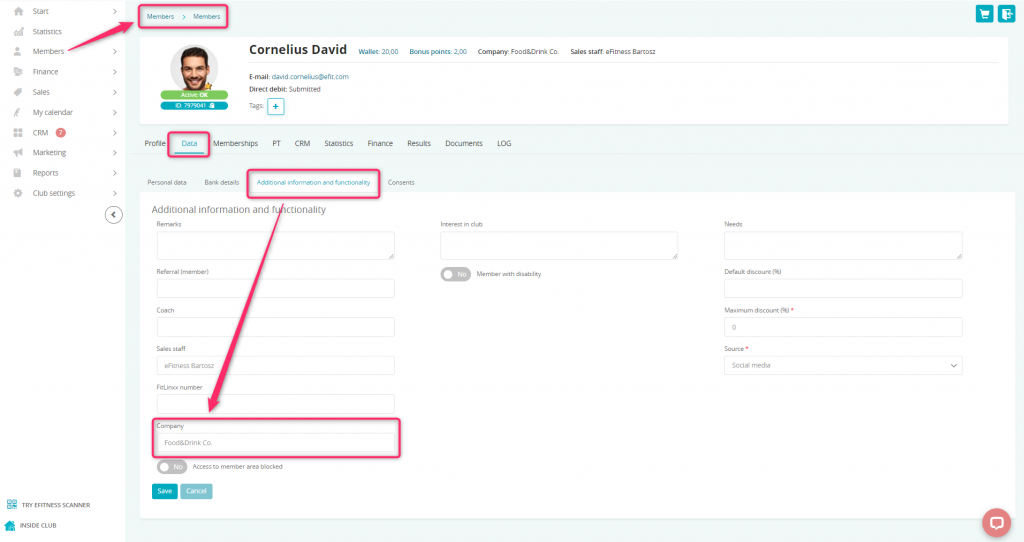
Important! After assigning a member’s profile to a company, all receipts from all members connected to this company will be shown on the member’s profile. This will ease the process of issuing a collective invoice.
In both cases, please bear in mind to save changes using the “Save” button.
2. Switch to the Sales -> Receipts -> Receipts tab.
3. Choose a receipt, to which an invoice should be created, using the checkbox icon on the right side. You can select more than one receipt at once.
4. Click on the New invoice button in the upper right corner:
5. A form will appear:
The fields:
- receiver
- seller
- Member/Corporate client
- Address
- Postal address
are entered automatically with the data from a Member’s profile.
An exception to this is the situation in which the invoice is being issued to receipts that do not have a profile associated with them.
The name of the product (service) is entered automatically based on the description and the value on receipts.
6. Use the Save button in order to issue an invoice.
You can also issue an invoice through the member’s proile, according to the following instruction.
How to assign a tax number to the member’s profile? Is it possible to assign a tax number during the bar sale?
You can assign the tax number to the member’s profile after switching to the Members -> Members tab -> enter a member’s profile -> Data tab -> Tax number -> Save button.
It is also possible to assign a tax number during the bar sales process. Switch to the Sales -> Bar tab and add an item to the cart. After clicking on the “Pay” button, a Tax number for the receipt field will be displayed in the upper part of the cart.
You would like to issue an invoice to the receipt, but you forgot to enter the tax number before the sales. How to change it?
In this case, a receipt cancellation is required. Switch to the Sales -> Receipts -> Receipts tab -> the cog wheel icon near the selected receipt -> Cancel. Please bear in mind that this cancellation is performed only in the eFitness system. After a receipt being cancelled, you should perform a sale once again and enter the tax number during the process.