Thanks to the “Block reservations” module, you are able to manually or automatically block new reservations for members, who sign in for the classes and doesn’t show up on them.
Automated reservations blockade
1. Move through Club settings -> Configuration -> Calendar -> Block reservations and use the sliders to turn the blockade on:
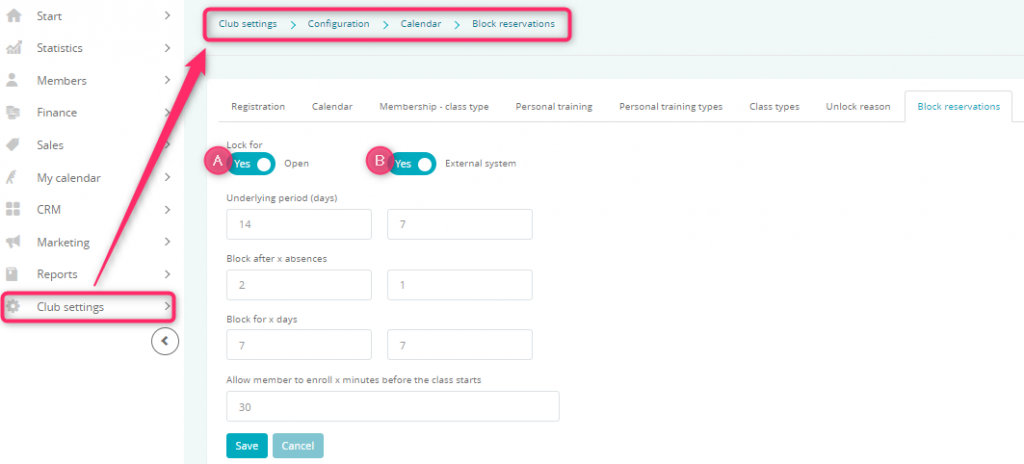
A) “Open” slider – our system will be verifying the presence on the classes for your members with the open and indefinite types of membership
B) “External system” slider – our system will be verifying the presence on the classes for your members with external system cards (sport cards, e.g. Multisport).
Important! Automated blockade of reservations does not include limited number of entries memberships.
2. Next, fill in the fields:
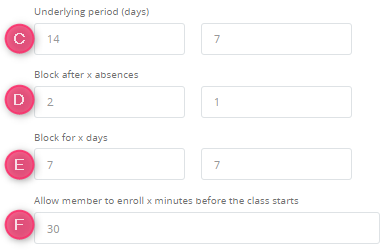
C) Underlying period (days) – set, how many days from the past our system has to check, when looking for the absence of your members
D) Block after x absences – set, after how many absences the blockade will be turned on
E) Block for x days – set for how many days the blockade will last (if your member was absent on the classes X times in Y time period)
F) Allow member to enroll x minutes before the class starts – you can allow your members to sign in for the classes X minutes before they begin (despite the blockade being turned on).
3. The blockade will be automatically turned on during the night, after the verification of presence on the classes. An information about the blockade will be visible on the profile:

Manual reservations blockade
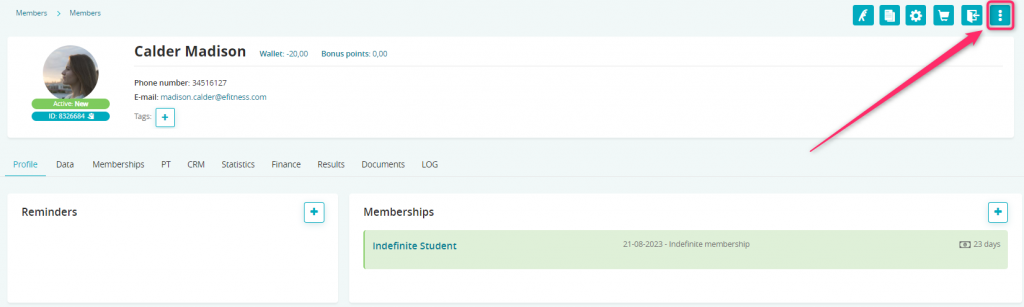
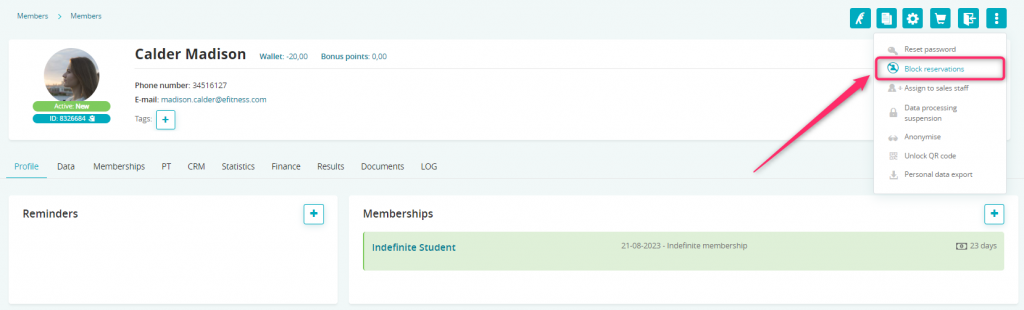
1. In order to manually add a blockade for the reservations, move to the member’s profile, to the Profile tab and click on the three dots icon:
2. Choose “Block reservations” from the list:
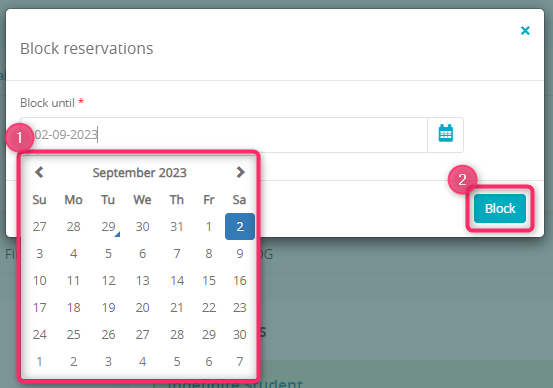
3. Set the period of the blockade and click “Block”:
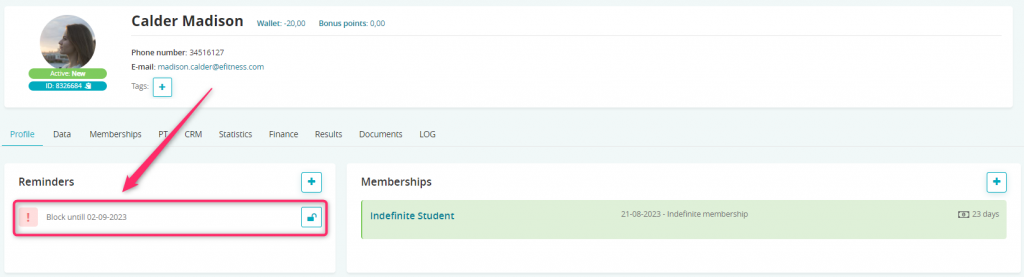
4. The blockade is also visible on the member’s profile:
Unlock reasons
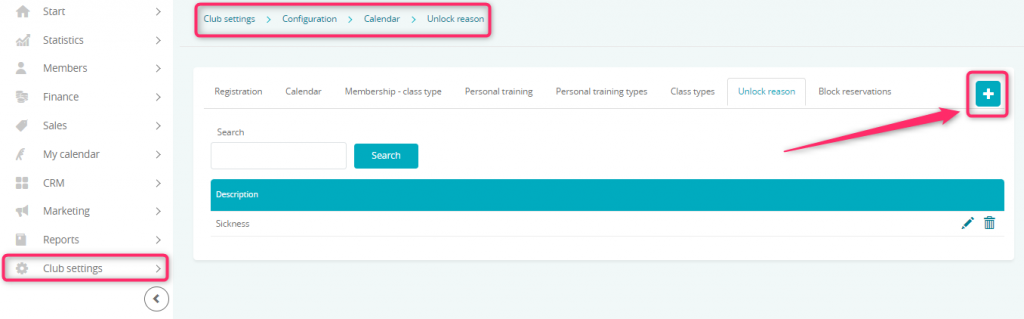
1. When you want to manually unlock the reservations for a specified member, you will be asked for a reason. In order to define new unlock reasons, move through Club/Chain settings -> Configuration -> Calendar -> Unlock reason and click on the “plus” icon in the upper right corner:
2. Fill in the form:
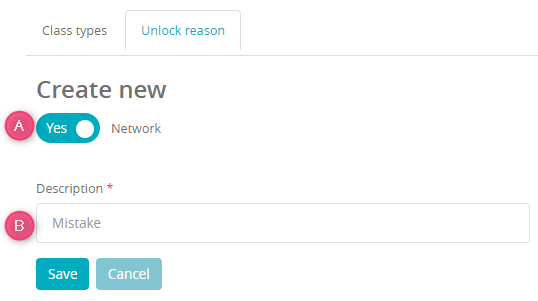
A) “Network” slider – if this slider is set as “Yes”, it means that this specific unlocking reason will be visible in the whole club network
B) Description – set the reason of unlocking
Manual blockade unlocking
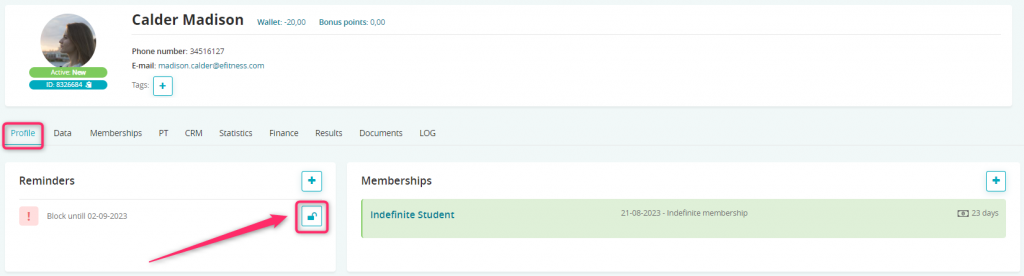
1. Move to the member’s profile, to the Profile tab and click on the “lock” icon in the “Reminders” part:
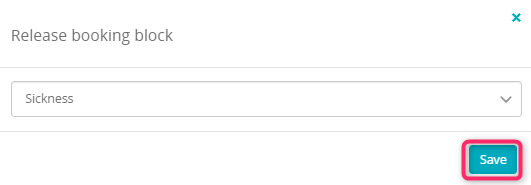
2. Confirm blockade unlocking and choose one of the predefined reasons:
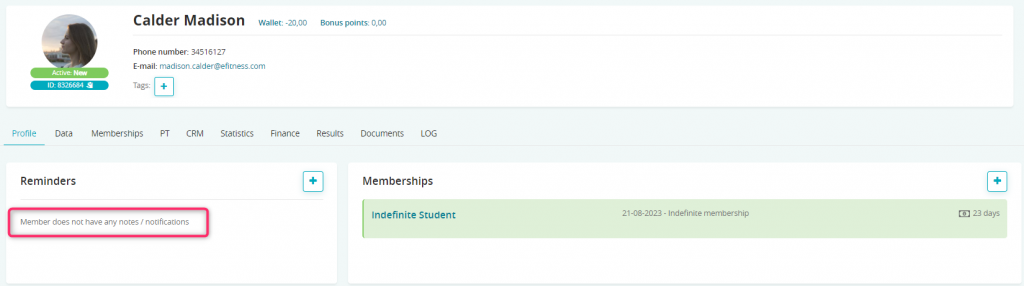
3. Blockade disappears from the profile:
Important! If the blockade will not be turned off manually, it will disappear from the profile automatically, after its ending time.
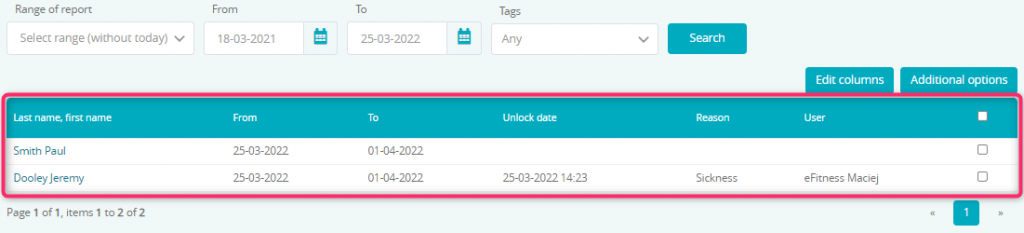
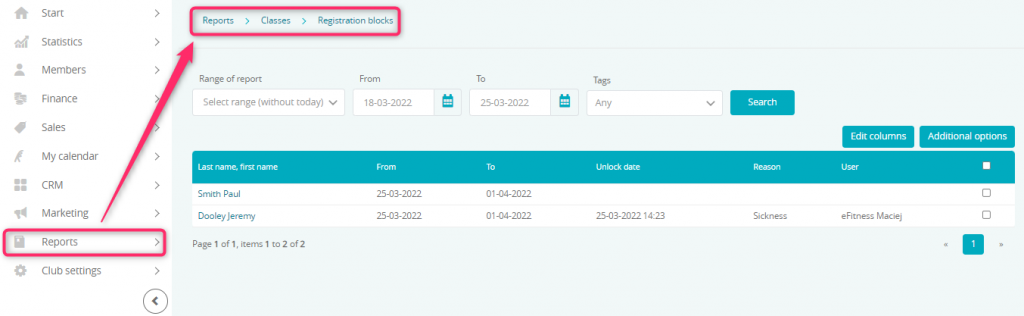
Reporting about the blockades
1. Move through Reports -> Classes -> Registration blocks:
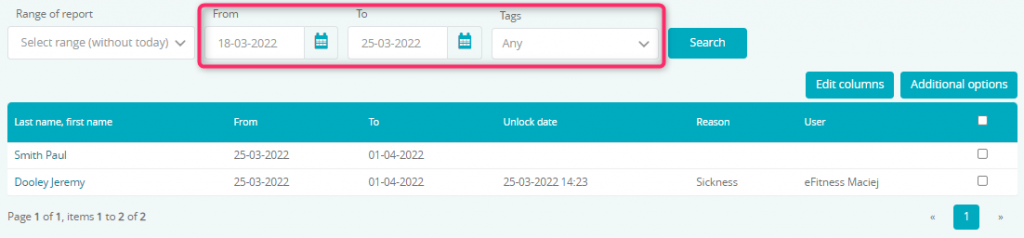
2. Choose the dates. You can also find your members using the tags attached to their profiles:
3. This report will give you information about all members, who had a blockade turned on during the selected period: