
In this article you will learn, how to configure the joining fee, which can be added to the memberships in the club or in the Member area.
Joining fee configuration
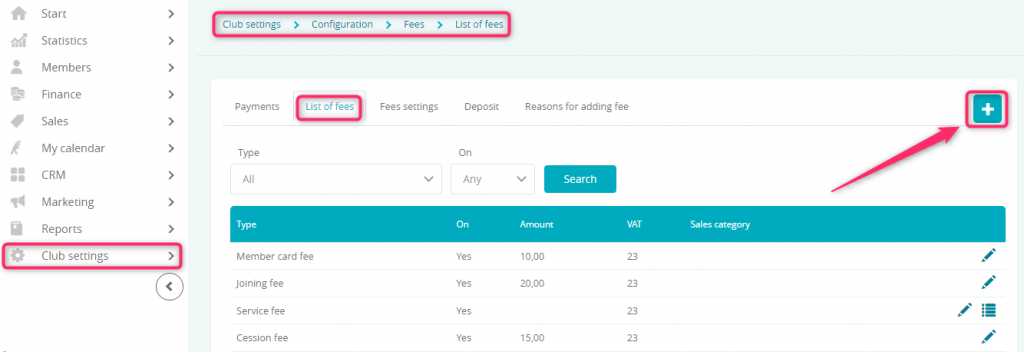
1. Move through Club settings -> Configuration -> Fees -> List of fees -> the plus icon in the upper right corner:
2. Fill in the form:
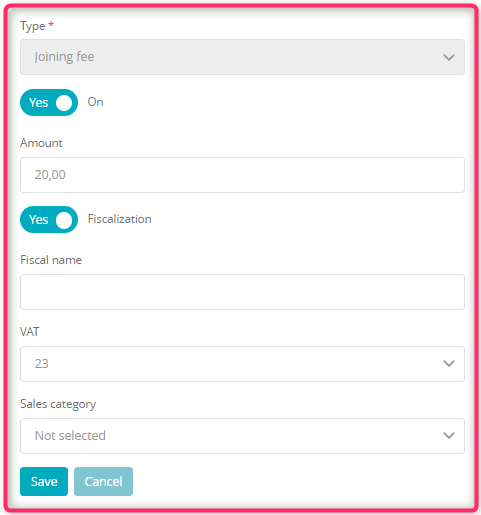
- Type – choose “Joining fee”
- The slider should be marked as “Yes” if your fee should be active
- Amount – enter the amount of your fee
- Fiscalization slider – you can choose if to the joining fee a fiscal receipt or a non-fiscal cash register document will be printed
- Fiscal name – enter the name of your fee, which will be printed on the receipt
- VAT – choose proper VAT tax rate
- Sales category – choose the sales category, which will help you in reporting process
3. Save the changes by clicking on the “Save” button: ![]()
4. Once you have added your fee to the list, you can edit it, using the pencil icon:

5. Move to the Fees settings tab, in order to define, when joining fee will be added:
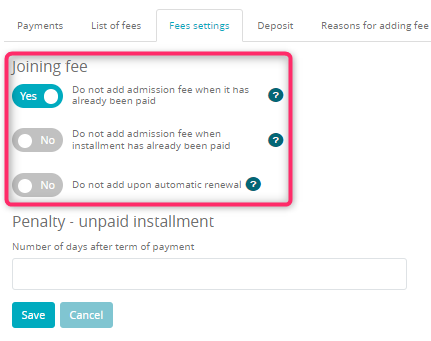
- Do not add admission fee when it has already been paid slider – refers to every membership sold, including these automatically prolonged/renewed. If for any of the previously added memberships the joining fee has been added paid, it won’t be added to the next, newly bought memberships
- Do not add admission fee when installment has already been paid slider – refers to every membership sold, including these automatically prolonged/renewed. If in any of the previously added memberships at least one installment has been paid, the joining fee won’t be added to the next, newly bought memberships
- Do not add upon automatic renewal slider – refers only to the memberships, which has been added as a result of an automated renewal. The joining fee won’t be added to these memberships, if this slider will be marked as “Yes”
Important! These settings regarding joining fee will only work for the memberships sold through the eFitness system (in the club’s reception) and through Member area.
6. Next step is to turn on joining fee in the membership’s configuration. In order to do so, move through Club/Chain settings -> Memberships -> Memberships -> pencil icon near the selected membership:

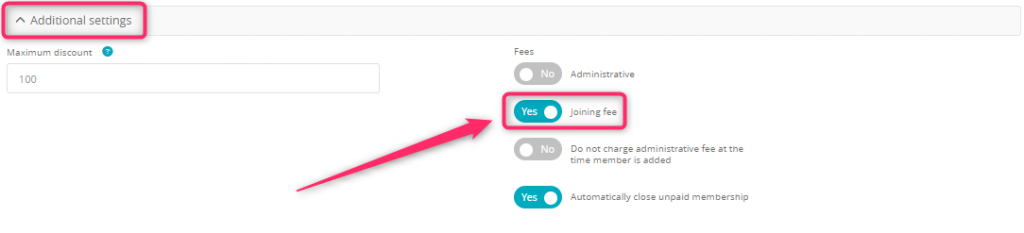
7. Move to Additional settings tab and turn the Joining fee slider on:
8. If the Joining fee, which will be added to the membership bought through Member area, has to be different, you can set that in the Internet tab. Simply fill in the “Joining fee” field:

Adding joining fee to the existing membership
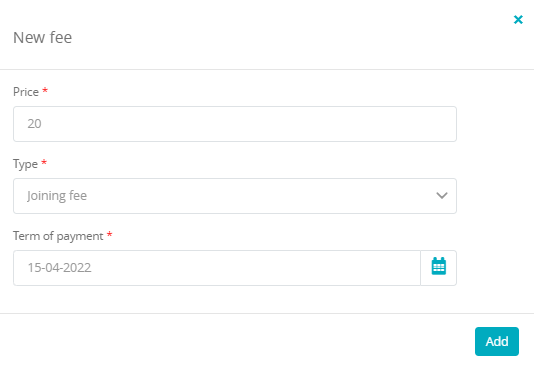
If the membership has already started, it is still possible to add joining fee. In order to do so, simply hover the cursor over the cog wheel icon and choose “New fee” option.
Next step is to choose fee type, its price and the term of payment. To add this fee to the membership, simply click on the “Add” button:
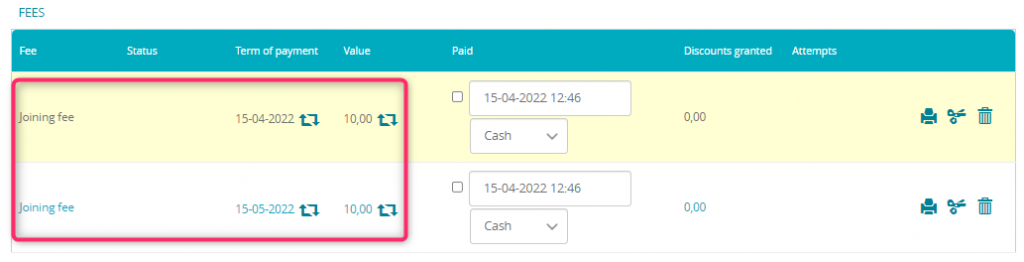
The added fee will be visible on the membership, in the “Fees” section:

You can use the bin icon ![]() to remove the unpaid fee.
to remove the unpaid fee.
You should properly configure new fees (as described above, in steps 1-3) prior to adding them to an existing membership.
Splitting the payment for parts
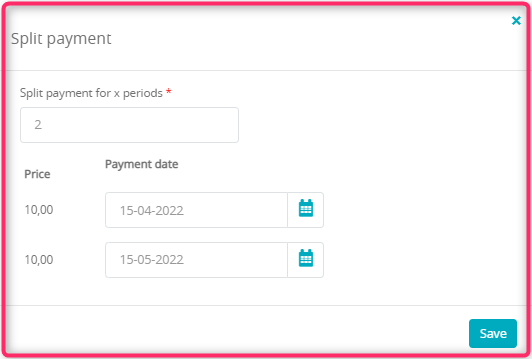
You can split the fee for a few installments, using the scissors icon near the chosen fee:

In the pop-up, select the number of installments, for which this fee will be divided, and choose the terms of payment:
After saving your changes, the new fee’s installments will be shown:
Important! You can divide the fee for a maximum of 10 installments. You can split only the unpaid fees.