
Want to keep your members informed? Follow this step-by-step guide to activate and manage announcements in the Member Zone.
Step 1: Enable the News View
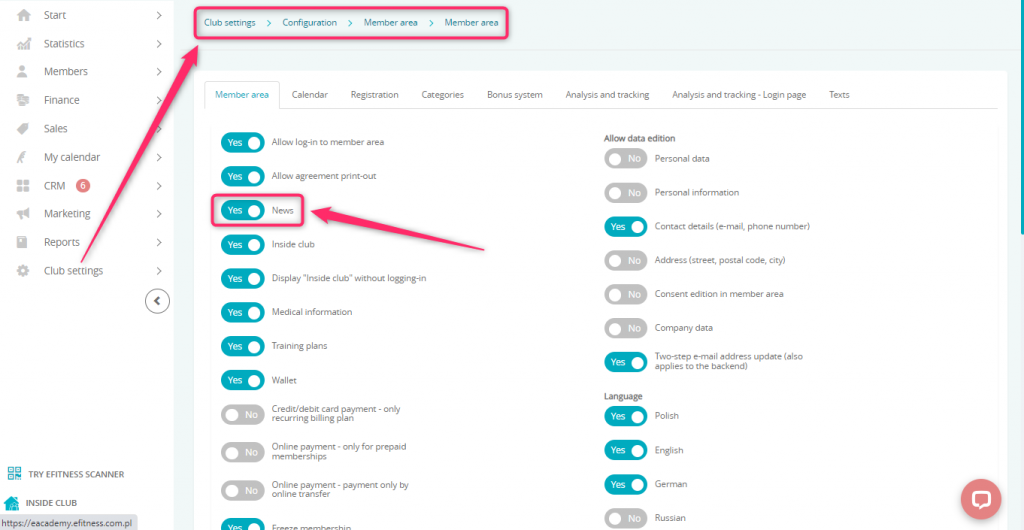
Before adding your first post, ensure the News section is visible to your clients.
-
Go to: Club Settings → Configuration → Member Zone → Member Zone.
-
Find the News toggle and set it to Yes.
-
Click Save at the bottom of the page.
Step 2: Create a New Announcement
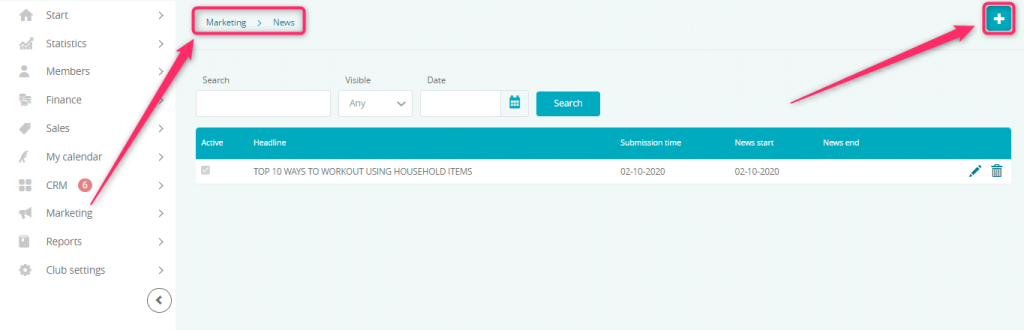
Once the section is active, you can start publishing content.
-
Navigate to the Marketing → News tab.
-
Click the plus icon (+) in the top right corner.
-
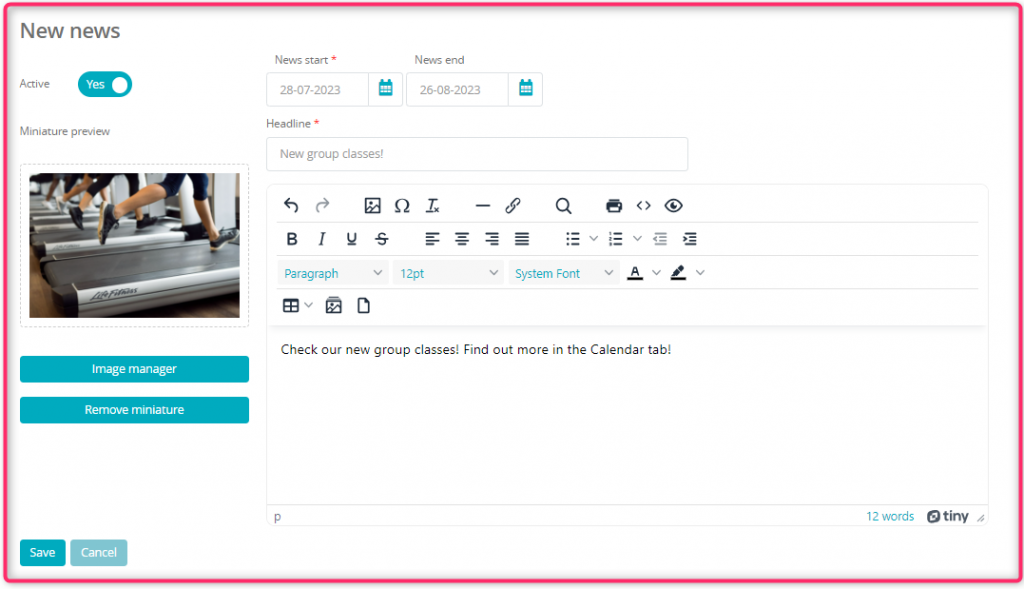
Fill out the form as follows:
-
Active: Set to Yes if you want the announcement to appear immediately.
-
Dates: Choose a start date (you can also set an end date for the news to expire automatically).
-
Image: Use the image manager to upload a photo (you can change or remove it later).
-
Content: Enter a catchy title and the body of your message.
-
-
Click Save.
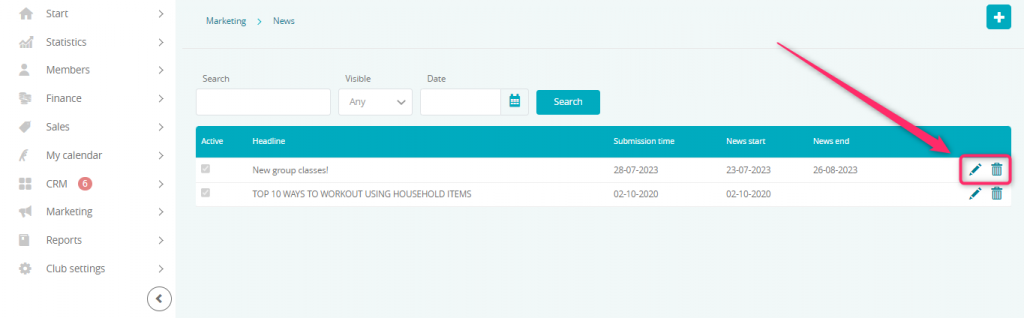
Step 3: Manage Your Posts
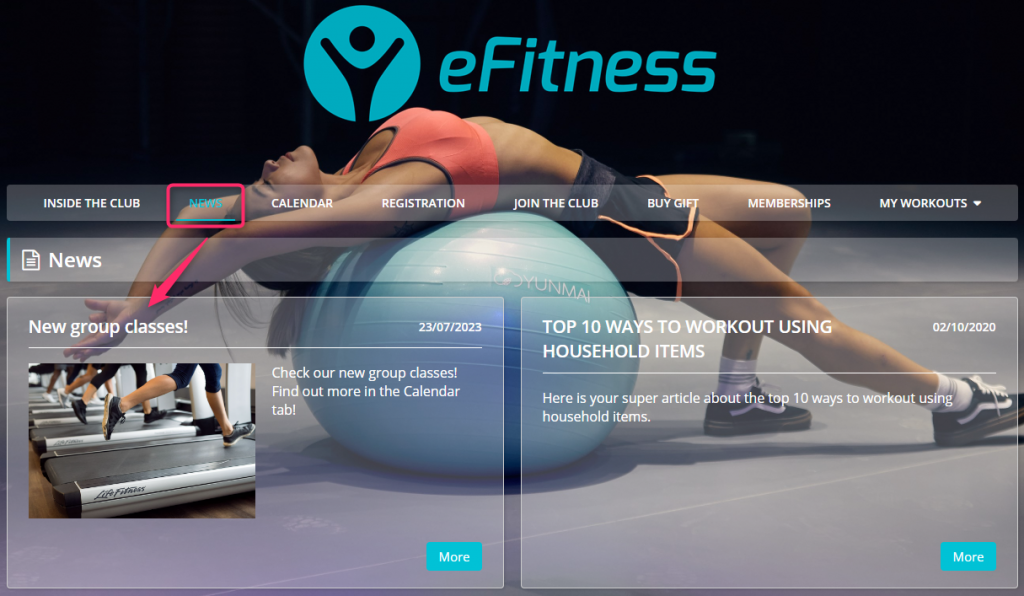
Your announcement will now appear in the News tab list. You can manage it at any time:
-
Edit: Click the pencil icon to correct typos or update information.
-
Delete: Use the trash icon to remove an announcement if it is no longer relevant.
Pro tip: Regularly updating your news is a great way to build engagement. Use it to announce new classes, special promotions, or simply to motivate your members for their next workout!