In this article you will learn how to introduce translations in the Member area.
You can increase your chances of selling memberships to international customers by adding translations to your Member area. It’s not only about increasing sales, but also about promoting your club. You can use them in membership descriptions, membership services, club news and member consents.
How to add translations in the Member area?
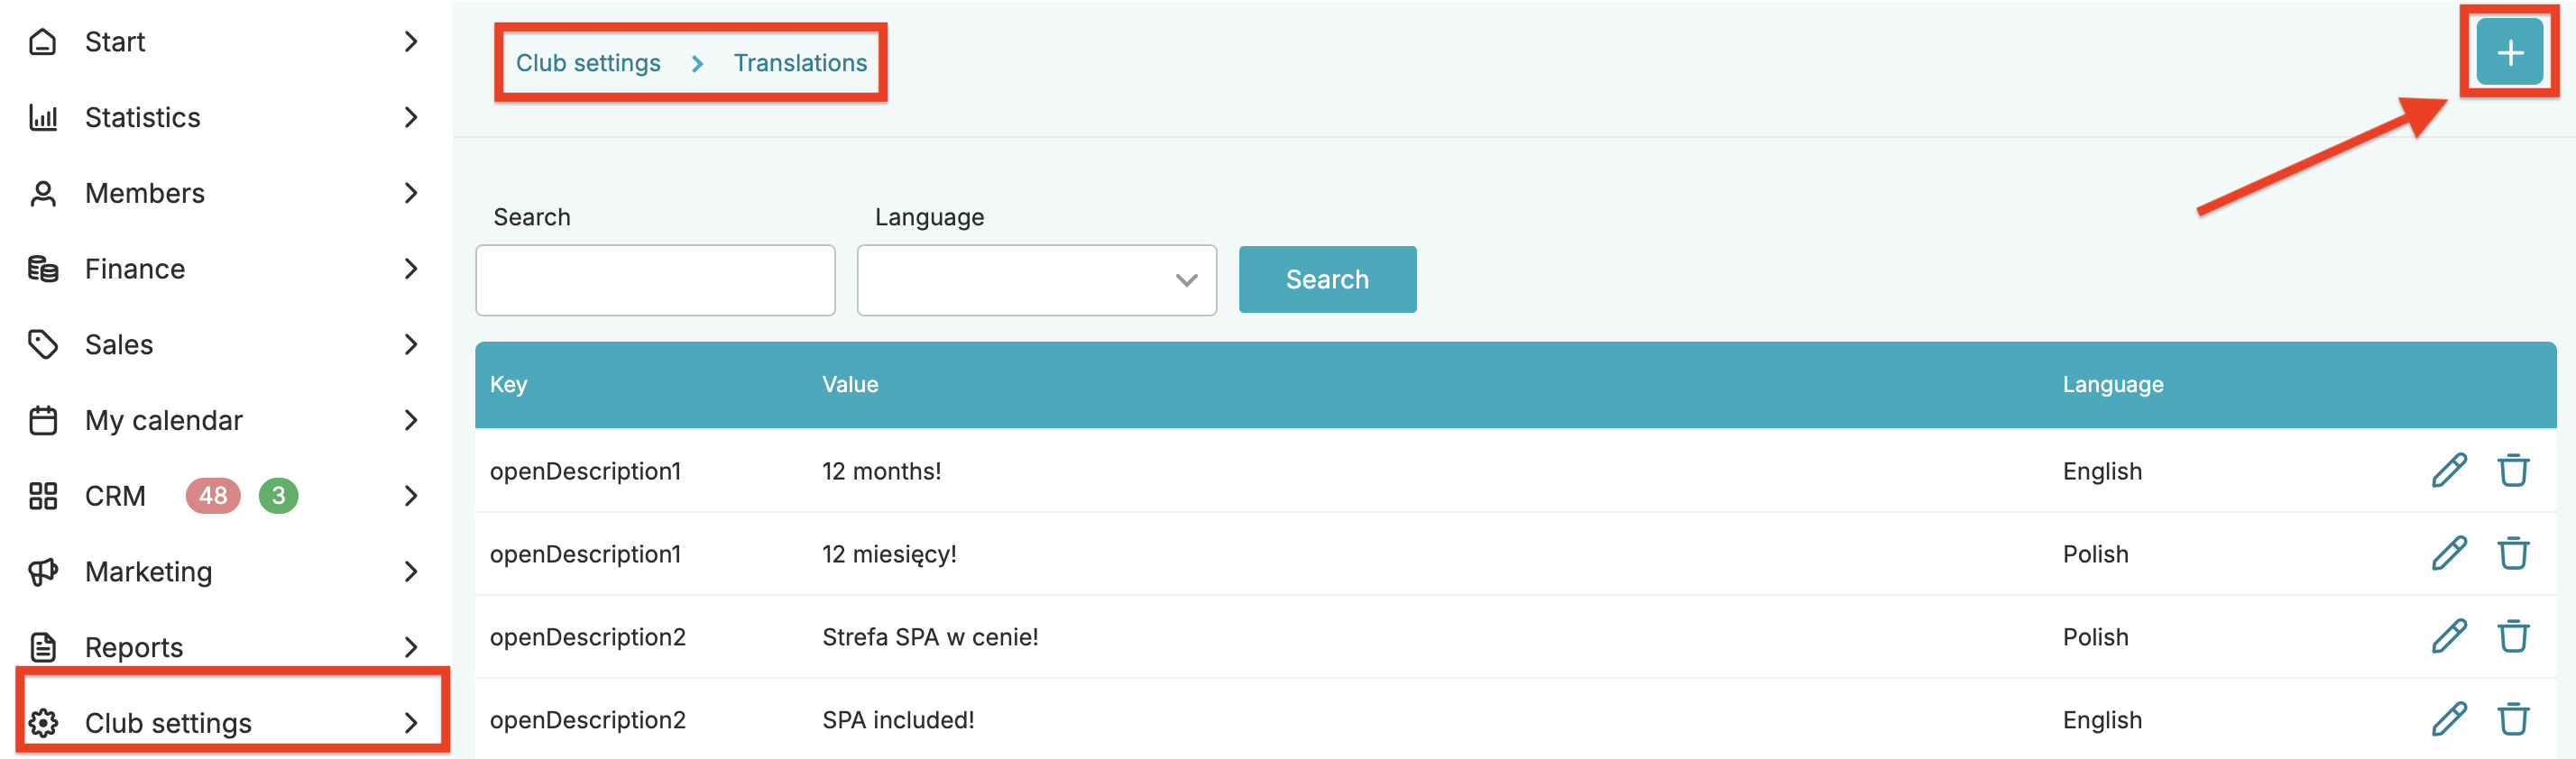
1. Go to the tab Club/Chain settings > Translations
2. Click on the ‘plus’ icon in the upper right corner
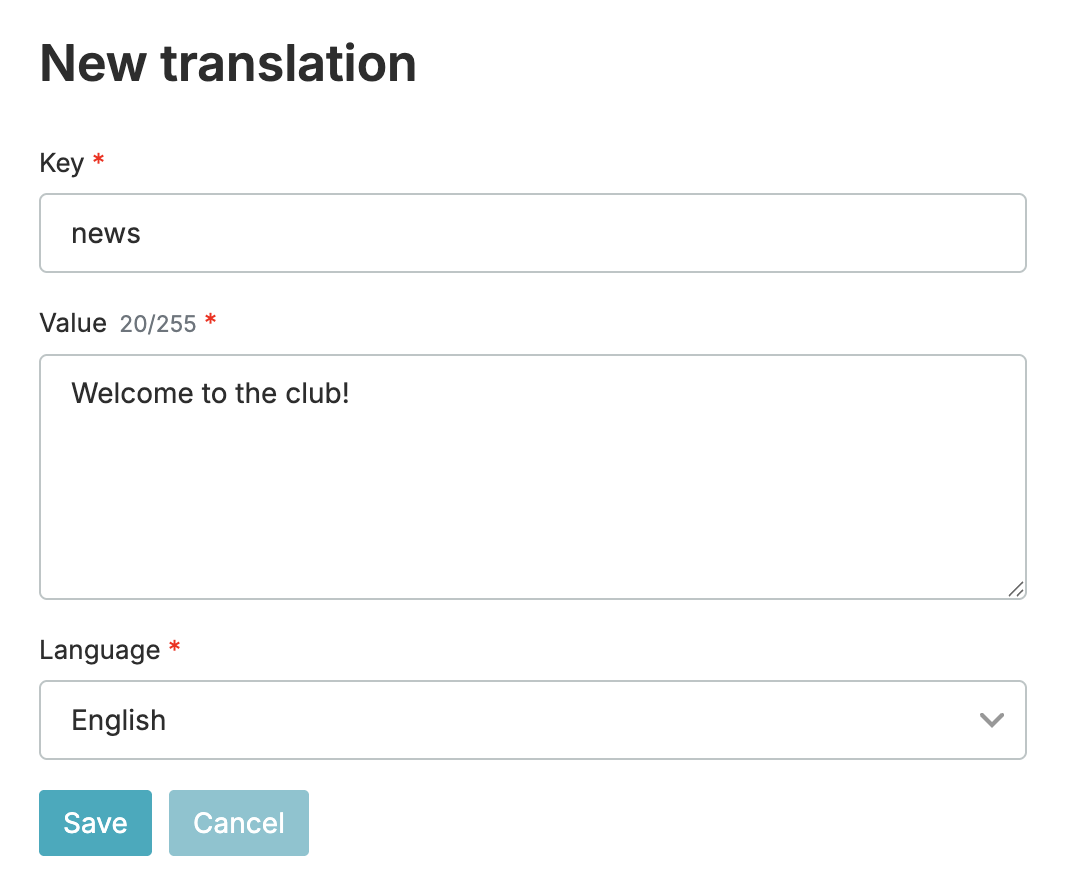
3. Fill in the first form with the original text and then create the second form with the translation:
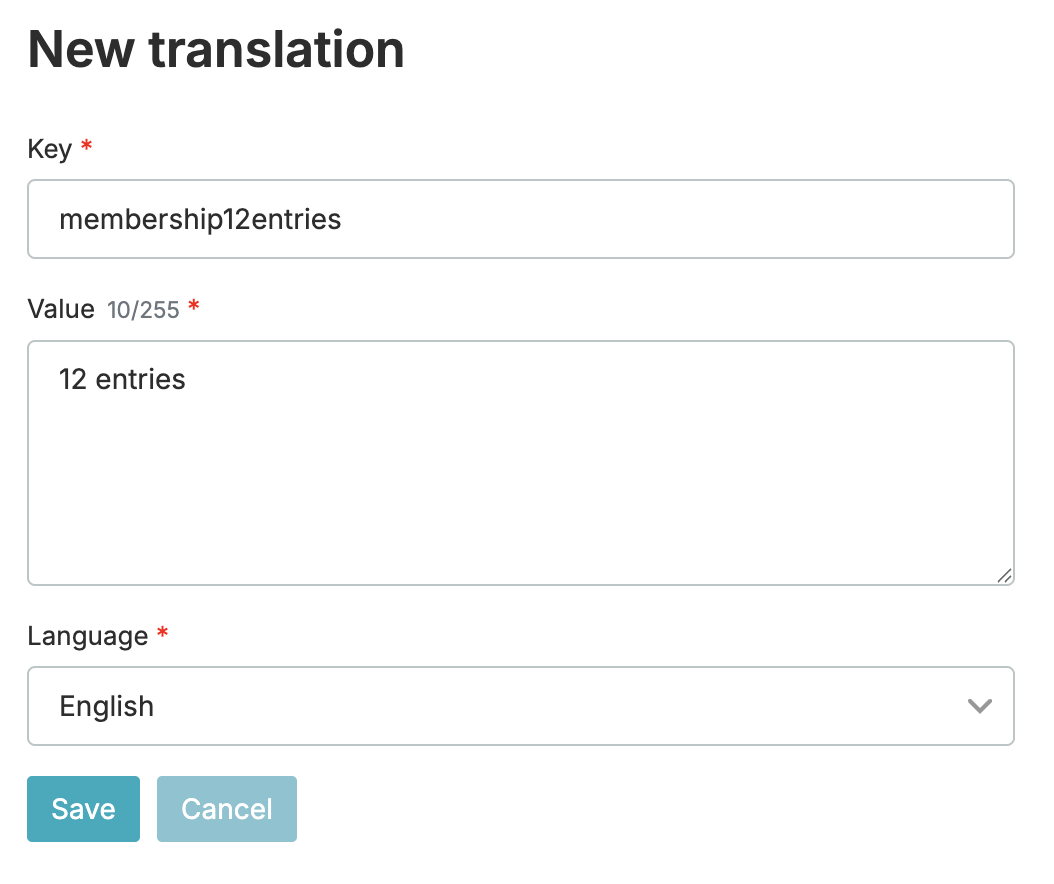
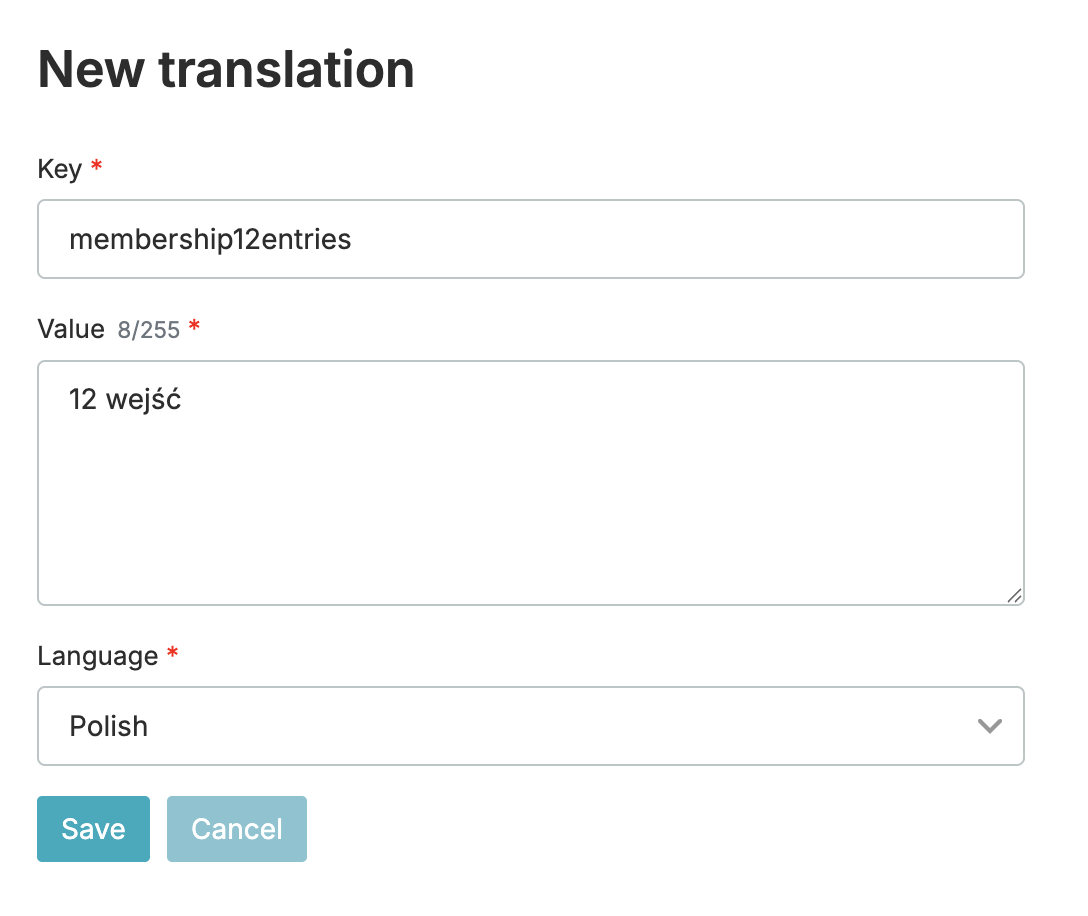
In the field Key enter the same translation key in every translation for the same text, e.g. membership12entries in the English version as well as in the Polish one. This field cannot contain white marks (e.g. space).
In the field Value you can enter the text that will be visible in the Member area. It doesn’t need to be a single word. You can also type full sentences.
In the field Language choose a language from the drop-down list for which the translation applies.
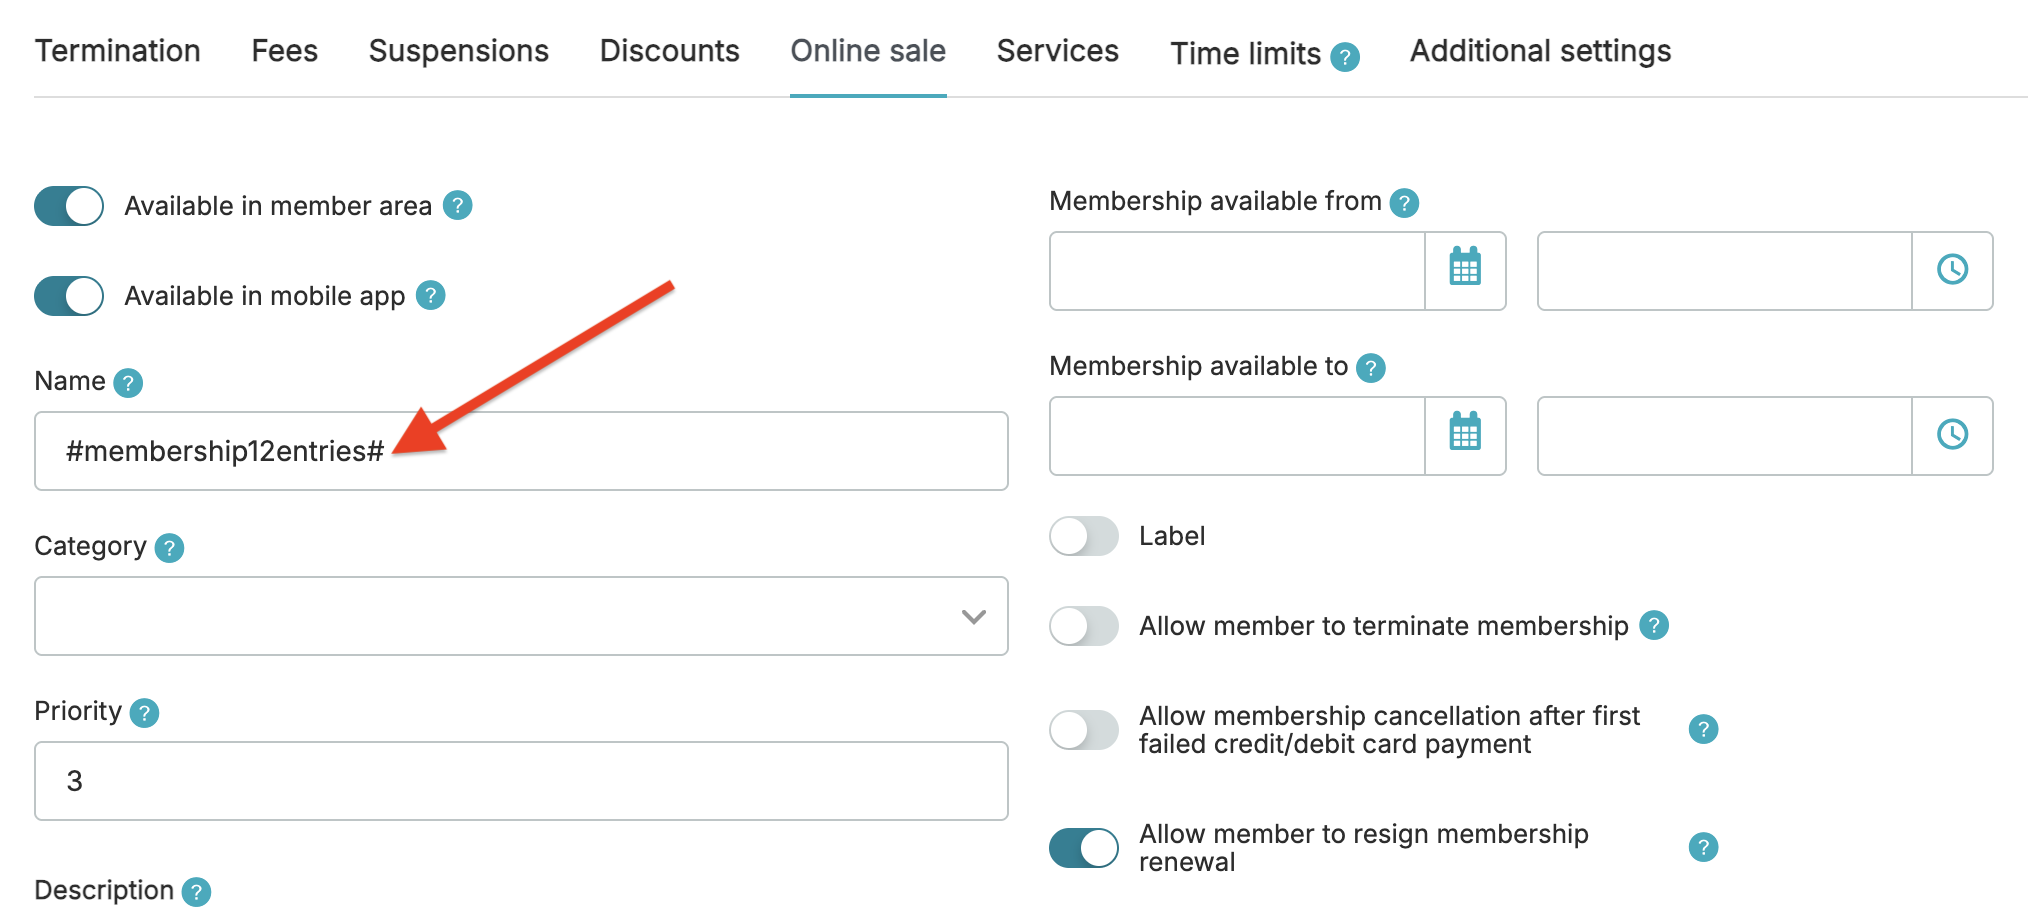
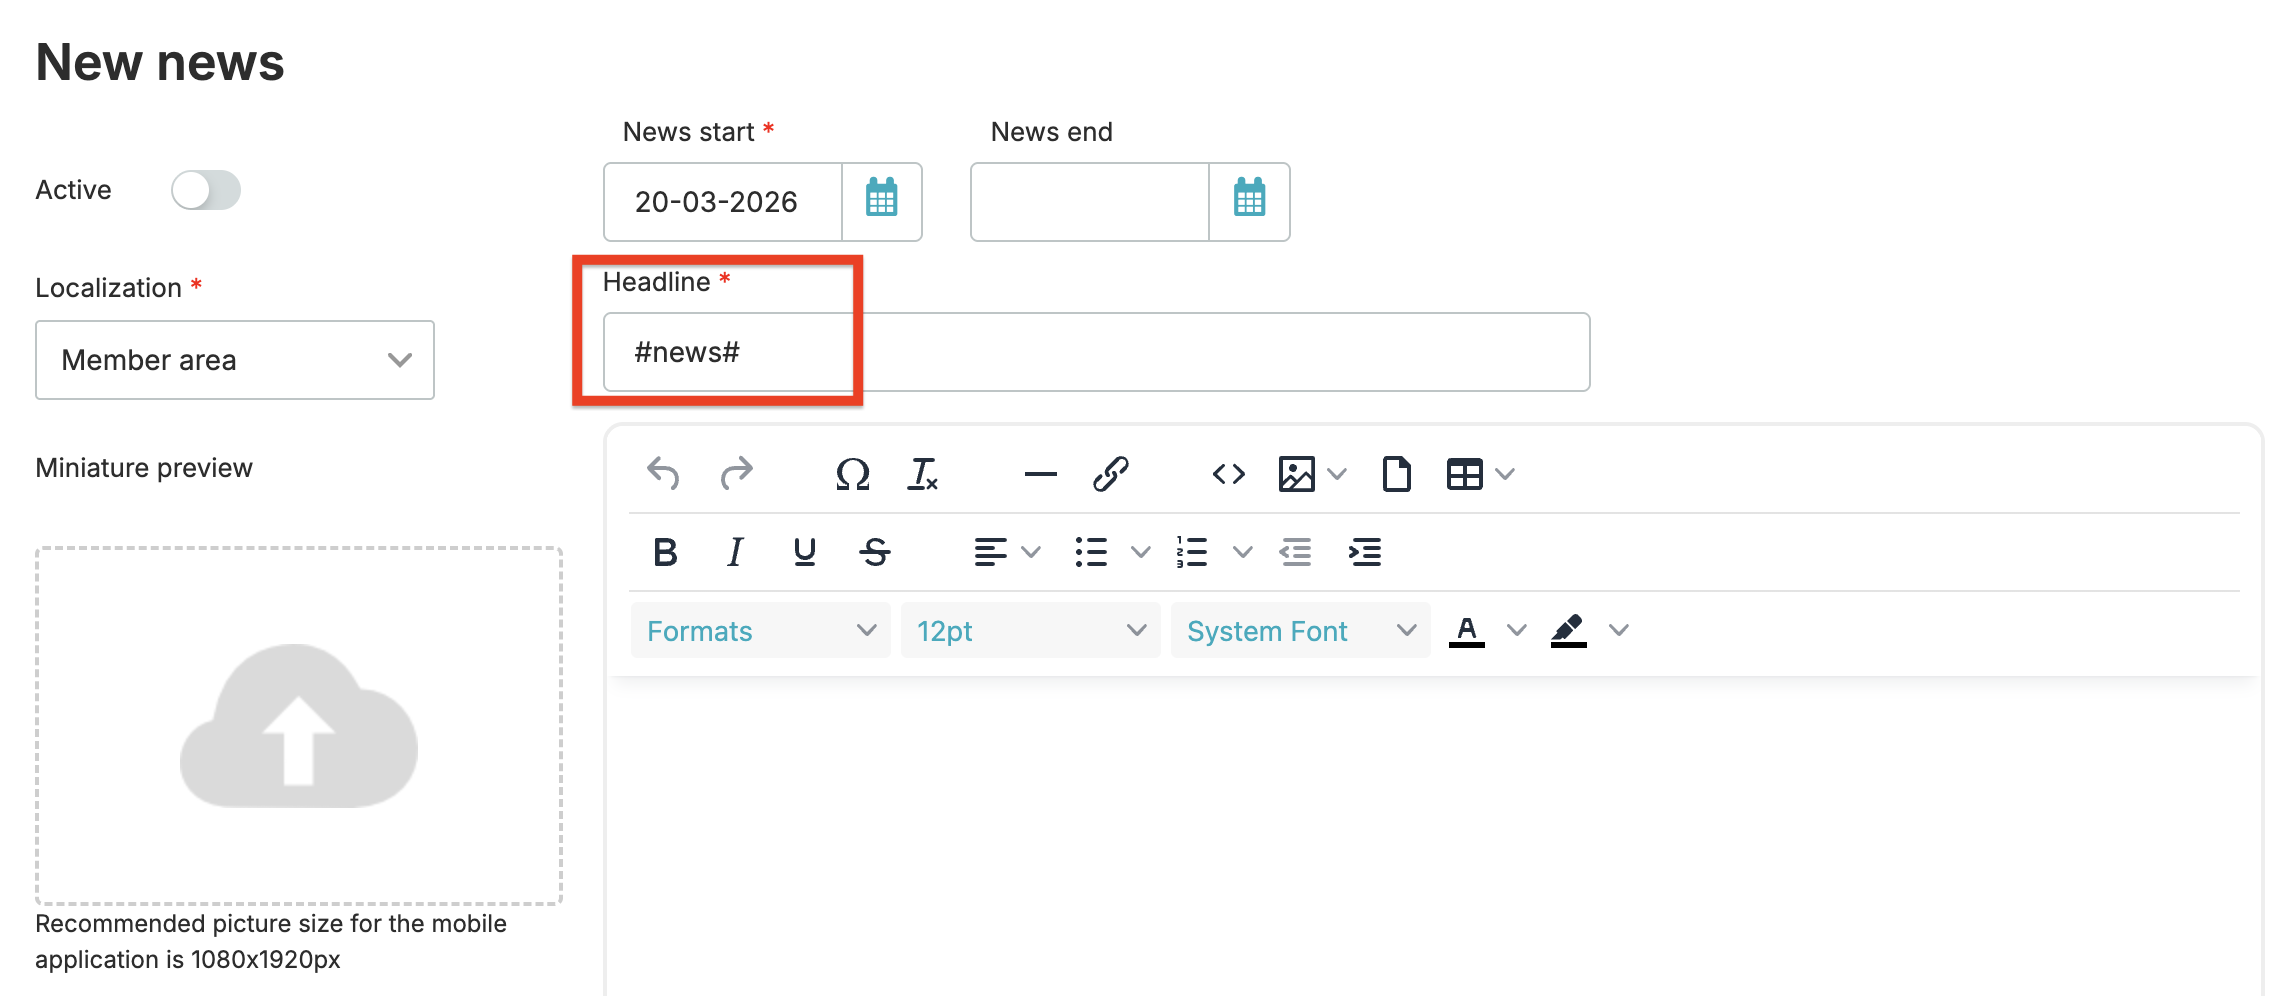
4. Enter the translation key, for example, membership name in the Member area (the tab Club/Chain settings > Memberships > Memberships > membership editing > Online sales) in between the # # signs, editing the already existing name.
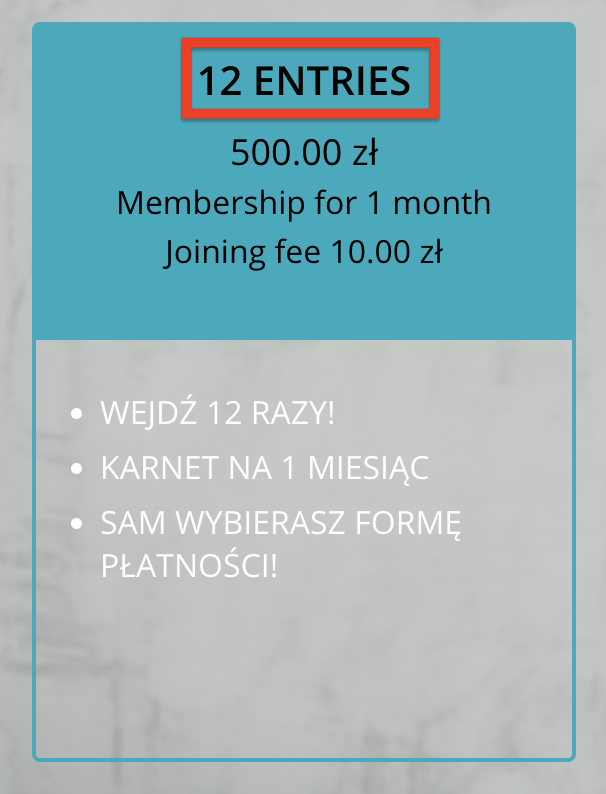
After changing the language in the top right corner in the Member area, the translation will be visible in the place where it was entered:
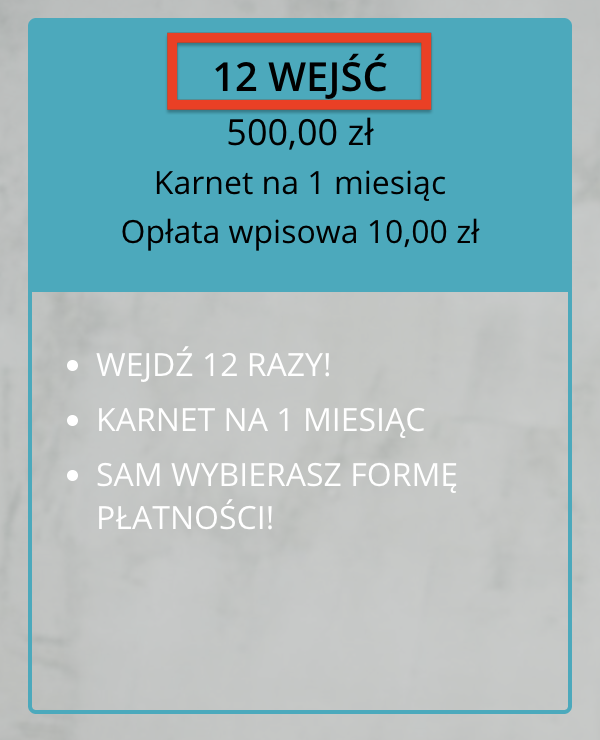
Note that the membership description hasn’t been changed, as only the membership name was modified. If you want to translate the membership description, you need to add additional translations. First, in the Club/Chain Settings > Translations tab, and then in the membership description under Club/Chain Settings > Memberships > Memberships > edit membership > Online sales > Description.
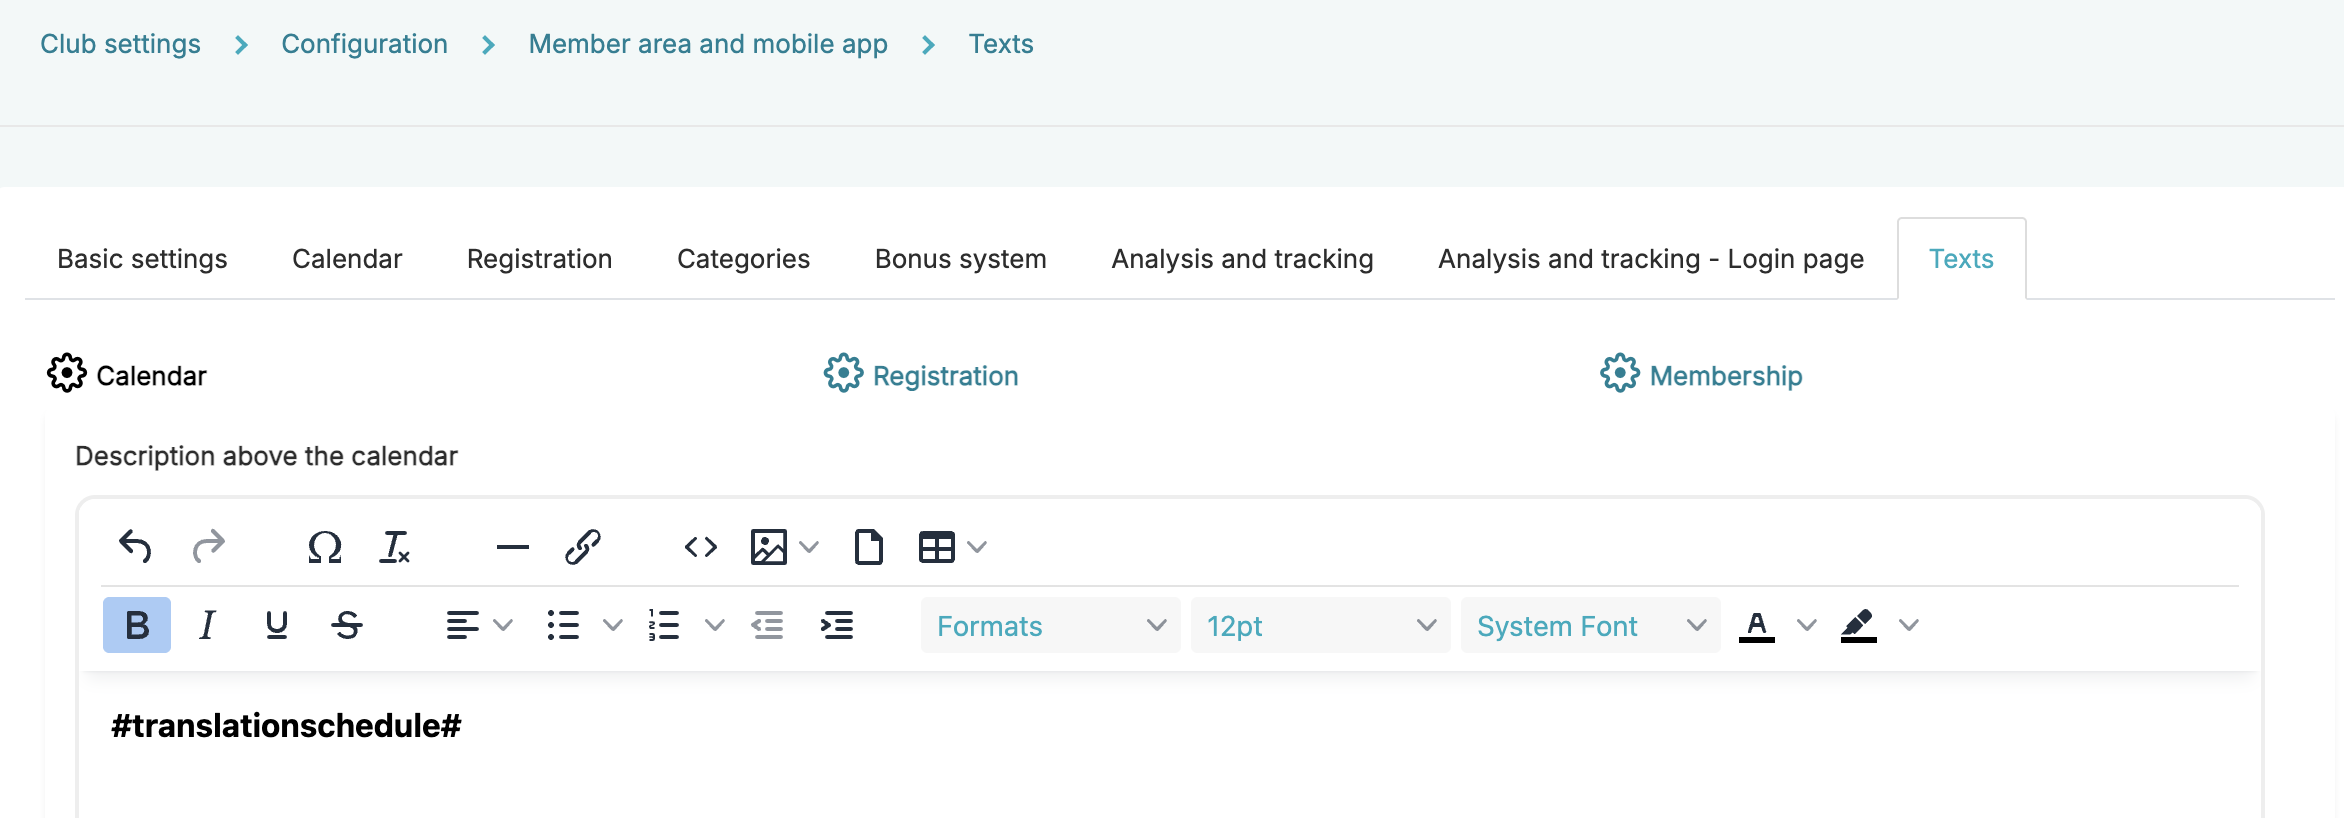
Translations in news, member consents and above the class schedule
Translations can be added not only to memberships and their descriptions but also to member consents, news and the section above the class schedule.
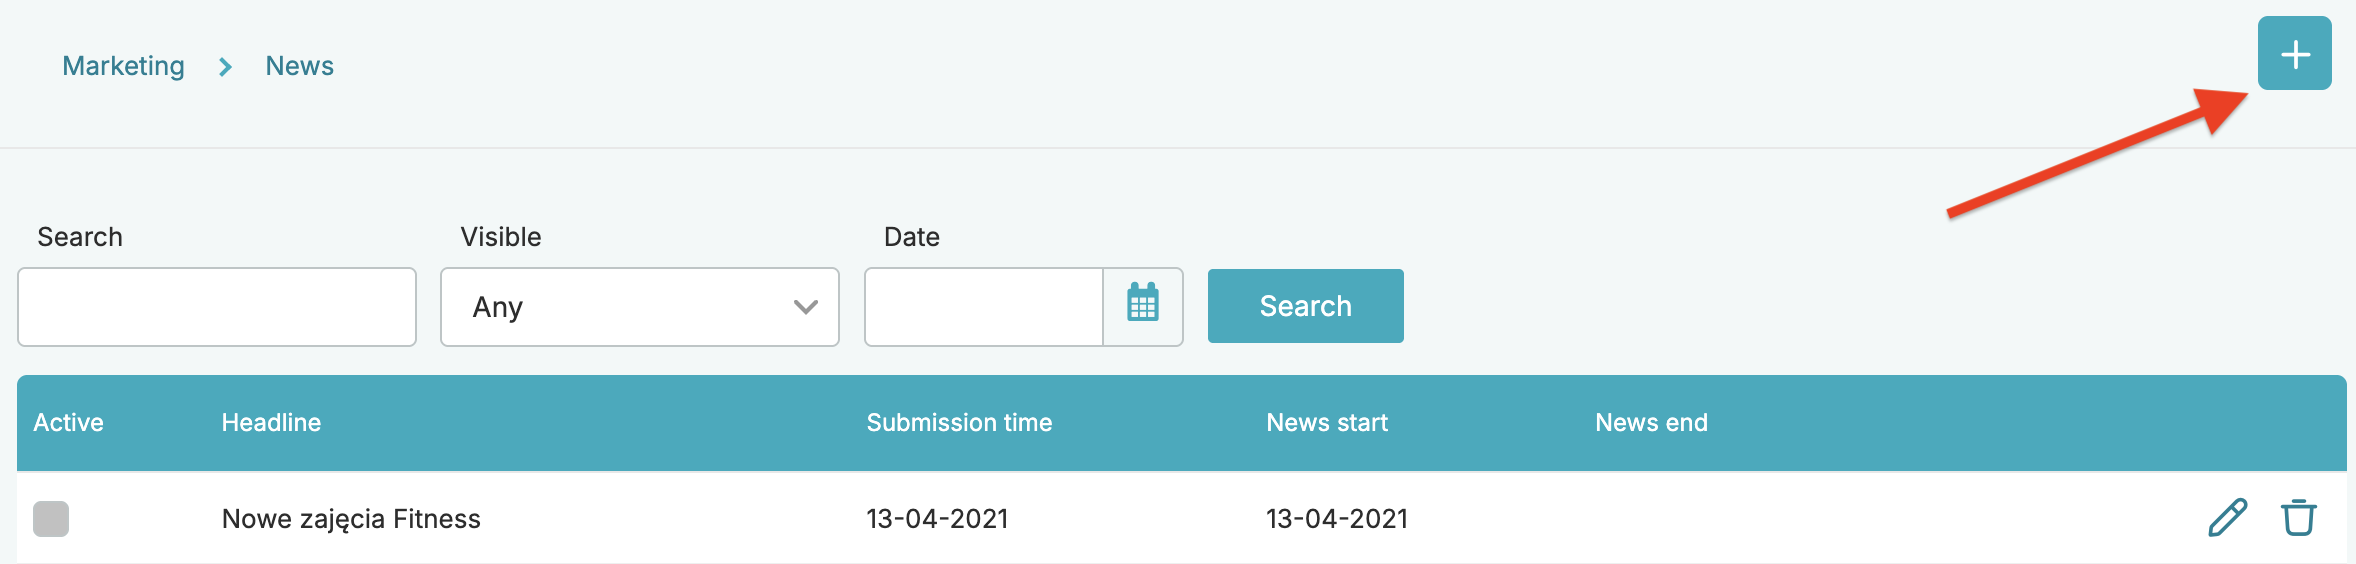
1. News – you can create news that will be displayed in the Member area. News is added in eFitness system under Marketing > News > plus icon. If you want to introduce translations to the news, first go to the translations section: Club/Chain settings > Translations > plus icon, enter all the required data according to the instructions, and then add the news using the key for your translations.

Remember that you can also translate the text of the news.
2. Member consents – if you want member consents to be translated in the Member area, create appropriate translations first. Then go to edit/create member consent section (Club/Chain settings > Configuration > Member’s options > Member consents > edit icon/plus icon) and enter the translation keys in the consent content.
3. Text above the class schedule – some clubs need additional space for information, e.g. about group classes. If you have added text above the class schedule and want to translate it, you can do that as well. First, add the translations, then insert the translation keys into the content of the field.