Push notifications are a very versatile tool. Using them you can easily inform your club Members about an upcoming training, new promotion, special fitness classes, that started in your club or about any special offers. All you have to do is to enable our eFitness mobile application for your club, which will give you the possibility to send push messages that are fast, efficient and completely free.
If you operate on the clubs’ network, you can easily send one notification to Members from all clubs.
1. How to enable Push notifications?
Push messages can be sent by you using the Marketing -> Notifications tab:
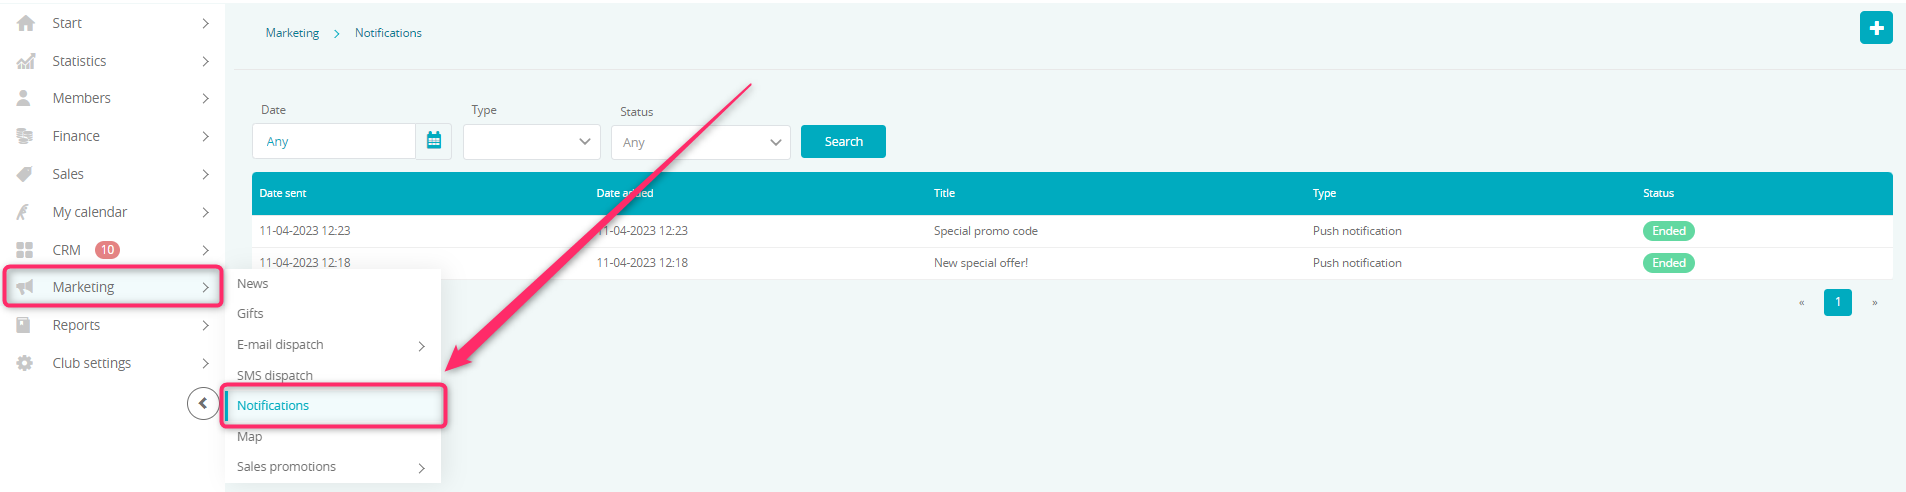
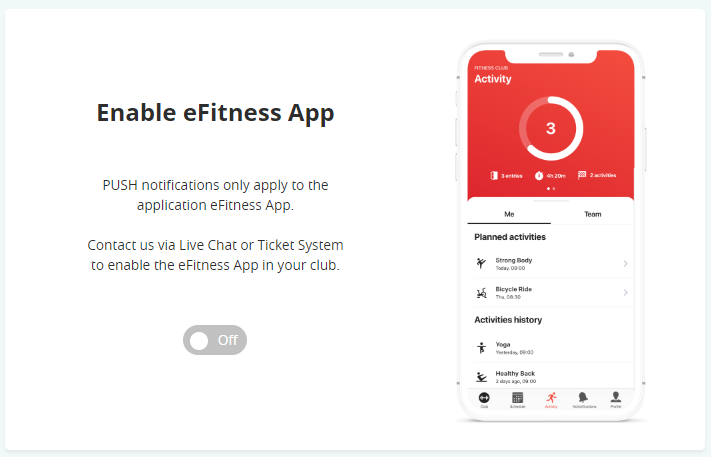
Push notifications only apply to the eFitness mobile app, so if you don’t have the eFitness app, follow the message shown in the Marketing -> Notifications tab:
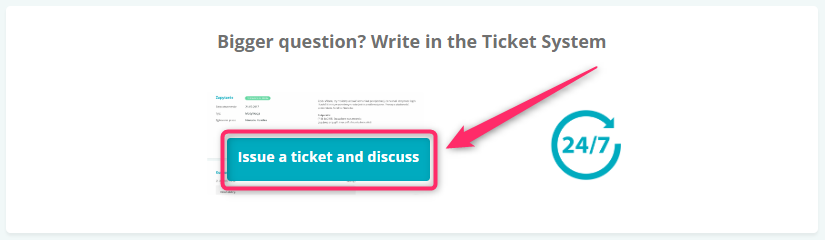
To write a ticket, on the upper system bar, click on the icon with a question mark -> Issue a ticket and discuss button:
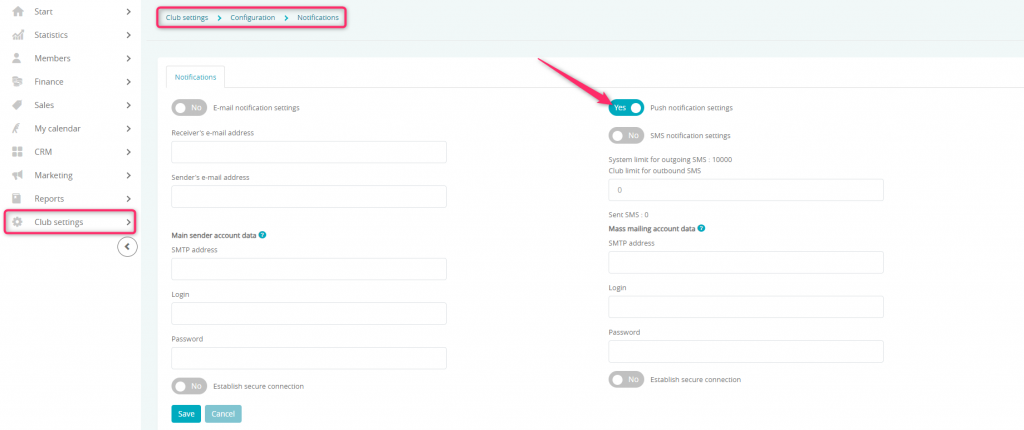
If you already have the eFitness mobile application launched and you want to send push notifications, switch to the Club settings -> Configuration -> Notifications -> mark the “Push notification settings” slider as “Yes”:
2. How to send Push notifications?
Switch to the Marketing -> Notifications -> the plus icon in the upper right corner:

At first, choose the message type and the recipients group:
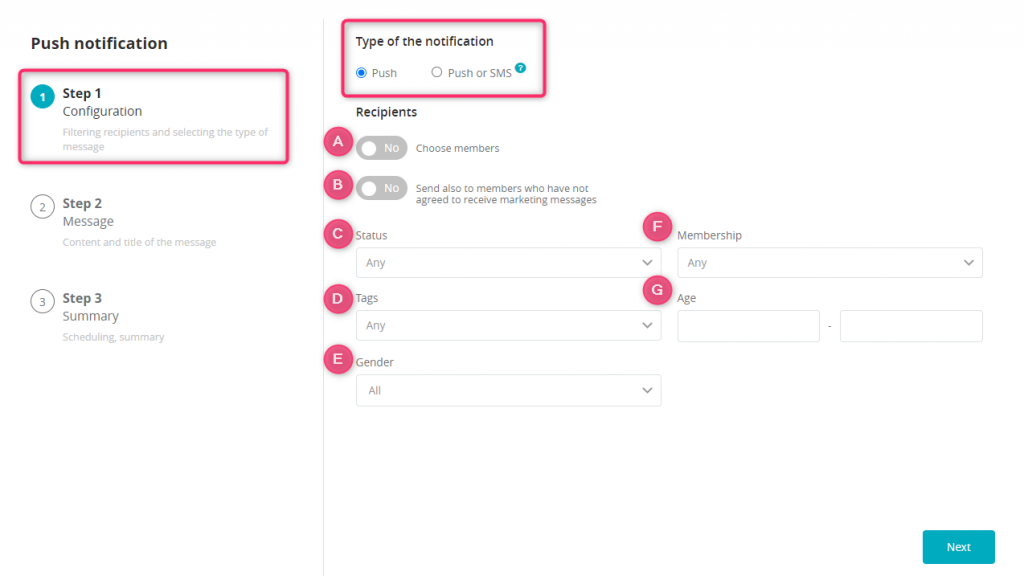
You can choose to send only Push messages or the Push or SMS option. If you choose the Push or SMS option two separate messages will be sent. A push notification will be sent first, to people who have the mobile app active. On the other hand, an SMS message will be sent to the rest of the people.
A – Choose members slider – you can select Members, to whom the notification will be sent. In order to do so, mark the slider as “Yes” and enter Members’ ID numbers, using the space bar as a separator:
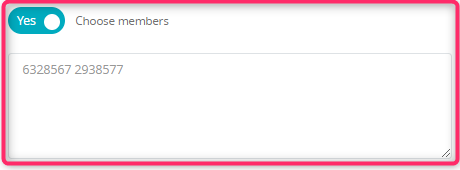
Important! Member ID is available on the member’s profile, in the Members -> Members tab, under the photo.
B – Send also to members who have not agreed to receive marketing messages slider – mark the slider as “Yes”, when, under the extraordinary circumstances, you want to send messages also to Members, who did not give the consent for this communication channel
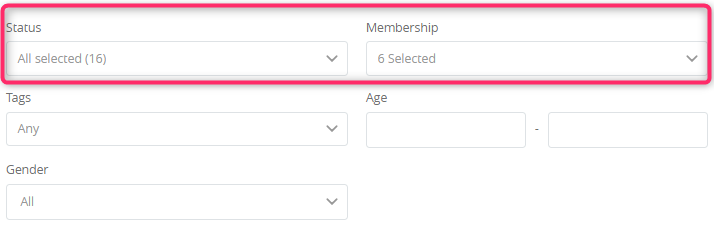
C – Status – choose message recipients by the member’s status. Statuses are described here
D – Tags – choose message recipients based on the tags assigned to their profiles
E – Gender – choose message recipients based on their gender
F – Membership – select proper memberships. Members having them will receive your push message
G – Age – select the age range of Members that should receive your push notification.
Important! You can select more than one recipients group at once:
Second step is to enter your push message, where you can use emoticons or graphic files:
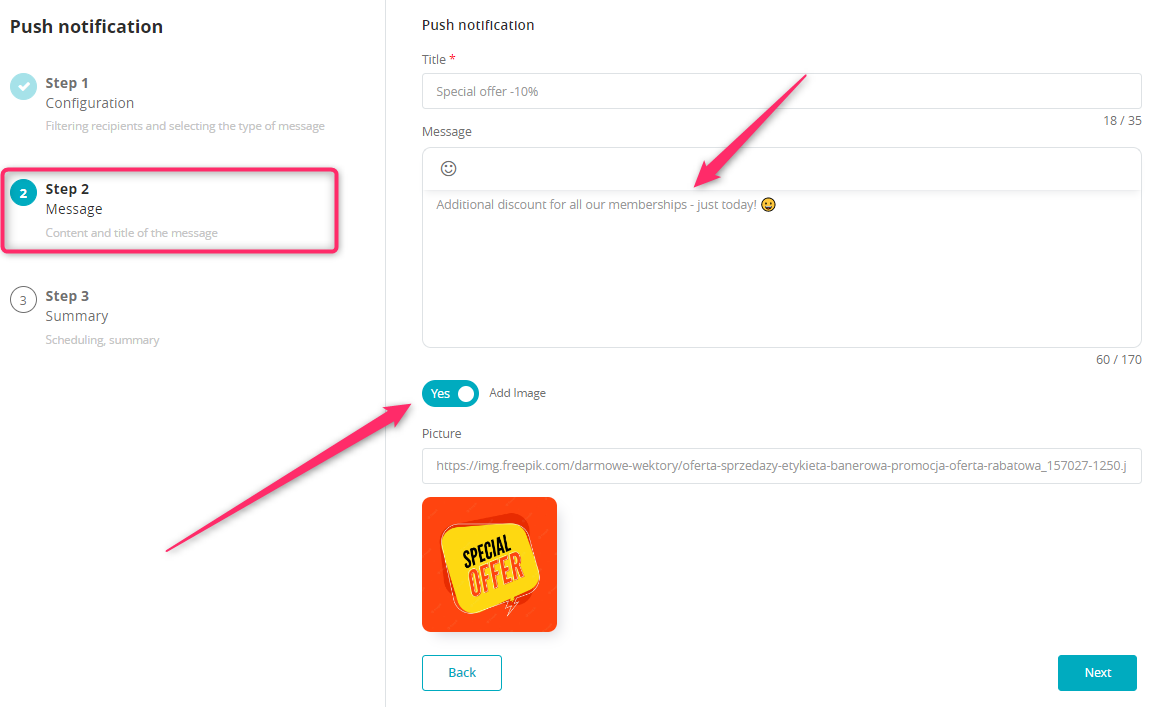
Important! In order to add a picture to your notification, an URL address will be required.
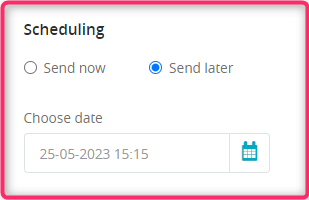
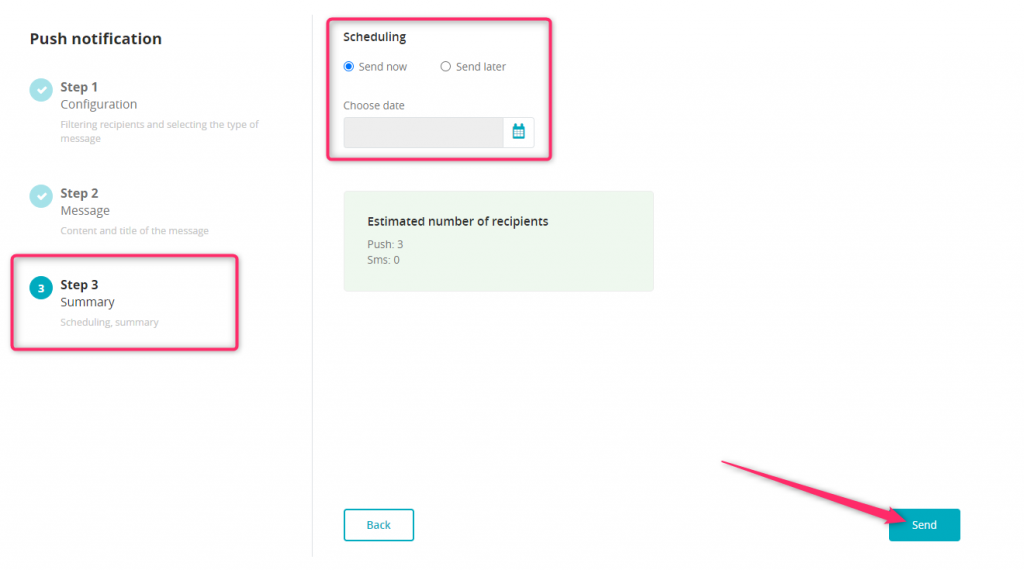
At the third step you will receive an information about the number of recipients of your push notification. You can also schedule when the message should be sent by selecting the Send Later option and then the date and time:
In order to accept sending the notification, simply click on the Send button:
Important! If the “Max number of recipients” is displayed as 0, it means that no Members fit your filters. For example, there are no Members with the selected tag assigned to the profile, which means that no notifications will be sent. Use the Back button and change the recipients group parameters.
3. Where are the Push notifications visible?
Already sent notifications are visible on the list:

Notifications can have the following statuses:
- in progress – which means that notifications sending is in progress
- ended – which means that all notifications have been sent.
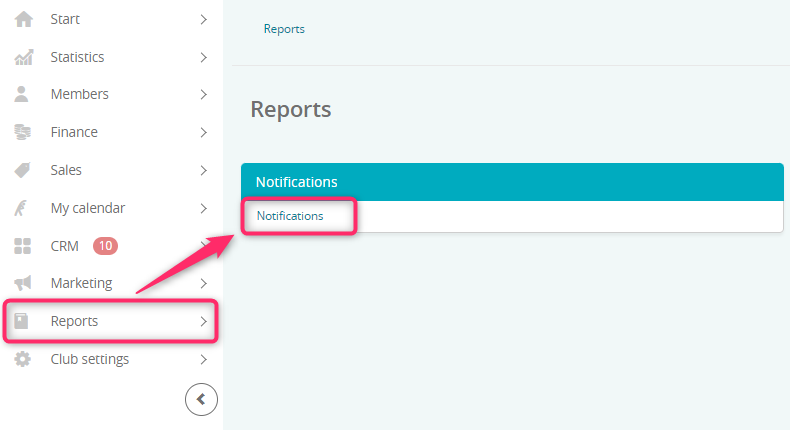
4. How to check the process of sending push notifications?
In order to do so, switch to the Reports -> Notifications -> Notifications:
In the given report you can easily check the notifications sending progress and status:
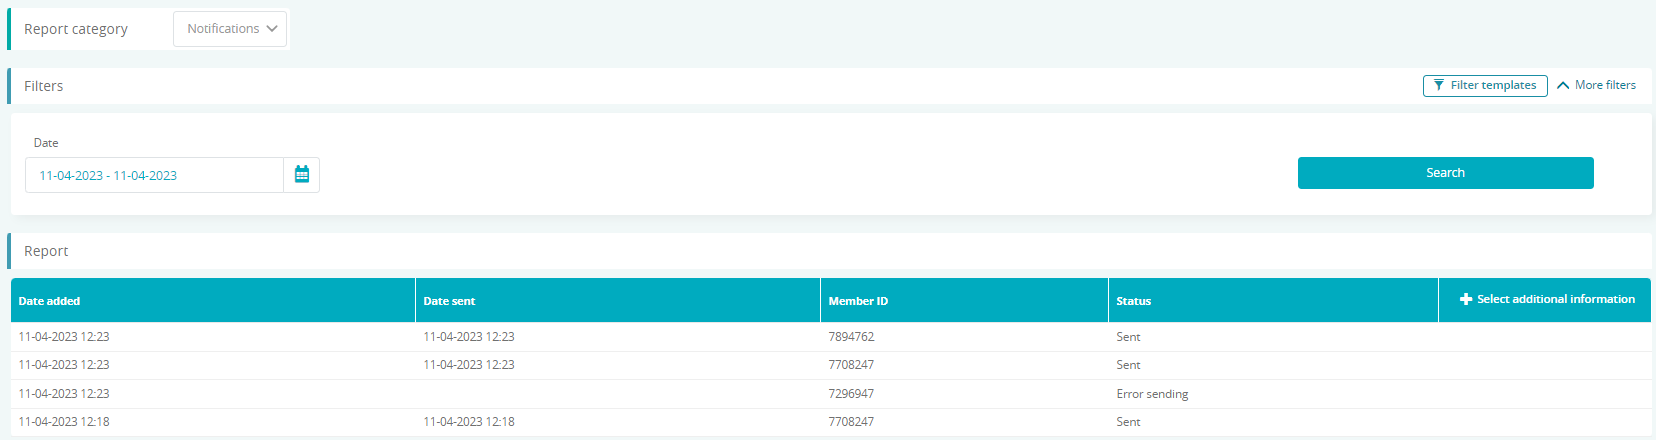
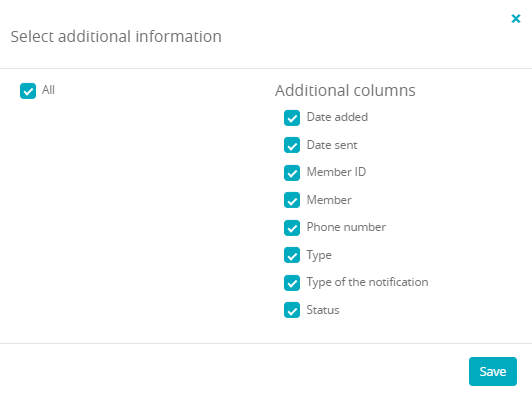
In order to see additional information and columns, click on the “+ Select additional information” button and select additional columns: