
In this article you will learn, what settings are available in the Club settings -> Configuration -> Member area:
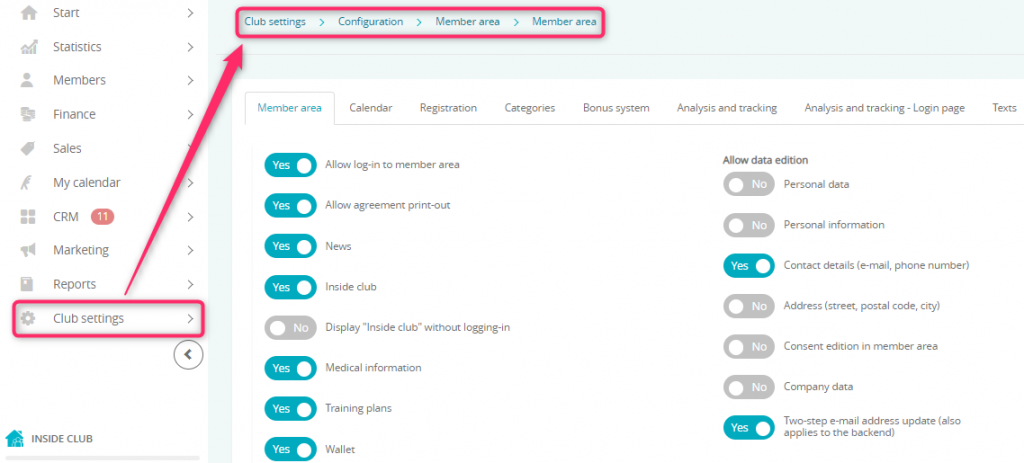
In this tab, you will define the way your Member area will work. You can enable additional tabs, decide about the rules of enrollments or choose the timetable views. You can also choose, which data will be obligatory to fill in during the process of membership purchase. It is also possible to modify the look of your Member area on your own, or with the help of a specialist.
1. Member area
The following settings (sliders) are available here:
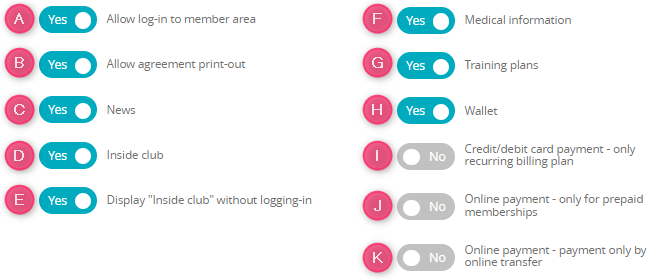
A) Allow log-in to member area – if you mark this slider as “Yes”, your Members will be able to log in to their accounts
B) Allow agreement print-out – your Members will be able to download and print agreement templates, connected to their type of membership
C) News – you can enable (or disable) the tab “News” in the Member area. In order to add a news, move through Marketing -> News. You can also check our article regarding how to add a news?
D) Inside club – you can enable the “Inside club” tab, where your Members will be able to find information about the current number of Members inside the club (available only after logging in)
E) Display “Inside club” without logging-in – you can decide, if the “Inside club” tab will be visible for everyone, or only for the club Members, who are logged in
F) Training plans – this slider enables the tab “My workouts -> Training sheets“, where your Members can download their training plans in pdf files. In order to create a new training sheet, check our article regarding how to create a training plan and how to use My members tab?
G) Wallet – marking this slider as “Yes” enables the possibility of recharging Members’ virtual wallets, which can be used inside the club
This service is precisely described in our article: How does the virtual wallet works.
H) Credit/Debit card payment – only recurring billing plan – this slider allows the payment for memberships with credit/debit card payment form to be done only by this method
I) Online payment – only for prepaid memberships – if in the memberships with one installment, online payment form is set as default, system will allow the payment for these memberships to be done only via online payments through PayU (online payments’ provider)
J) Online payment – payment only by online transfer – if in the membership an Online payment is set as default, system will allow the payment for these memberships to be done only via online payments through PayU (online payments’ provider)
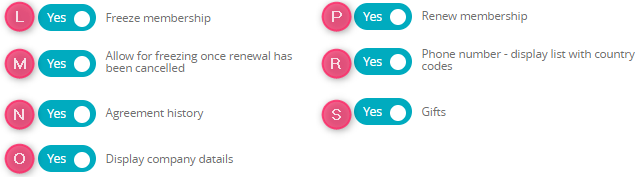
K) Freeze membership – marking this slider as “Yes” will allow your Members to freeze or unfreeze their memberships through Member area
L) Allow for freezing once renewal has been cancelled – mark the slider as “Yes” if your Members will be able to freeze their memberships after issuing a resignation from the renewal
M) Agreement history – enables membership history, which will be visible on the Member’s profile in the Member area
N) Display company details – you can display your company’s data in the footer
O) Renew membership – displays an additional button in the Agreements tab; using this button will redirect your Member to the process of a new membership purchase
P) Phone number – display list with country codes – during the registration process, a list of area codes will be displayed, in order to avoid mistakes and typos (this list will be visible only if you collect this type of data in the registration form)
R) Gifts – you can enable an additional “Buy gift” tab in Member area; you will be able to sell vouchers there. In order to create a new voucher, check our article: How to create gifts in eFitness?
Additional settings:
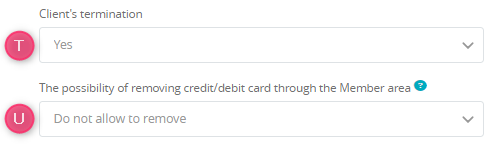
S) Client’s termination – choose, if your Members will have the possibility of issuing a client’s termination through Member area
T) The possibility of removing credit/debit card through the Member area – choose, if your Members will be able to remove their credit/debit cards through Member area
Choose, which type of data your Members will be able to change/modify on their own, through Member area:
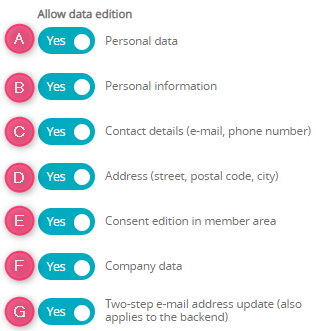
A) Personal data – mark the slider as “Yes” if your Members will be able to change their first and last name
B) Personal information – mark the slider as “Yes” if your Members will be able to edit their birth date, place and their sex
C) Contact details (e-mail, phone number) – mark the slider as “Yes” if your Members will be able to change their contact data (phone number and e-mail address)
D) Address (street, postal code, city) – mark the slider as “Yes” if your Members will be able to edit the street, house number and the city
E) Consent edition in member area – mark the slider as “Yes” if your Members will have the possibility of activating and deactivating their consents, which are not obligatory (without a red star). Obligatory consents will not be possible to deactivate
F) Company data – mark the slider as “Yes” if your member will be able to add and edit the data of the company, which is connected to the Member’s profile
G) Two-step e-mail address update (also applies to the backend) – mark the slider as “Yes” if your Member, during changing his e-mail address, will have to confirm this action on the e-mail box. This setting will also apply to the situation, when e-mail address will be changed by the club’s employees
Choose additional options:
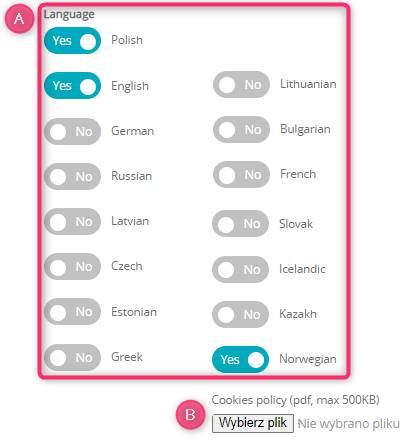
A) Language – choose languages, which will be available in the Member area. Please remember, that only the system parts (like the tabs names) will be translated. In order to translate also the news, membership or classes description, use our translations creator
B) Cookies policy – you can upload your club’s cookies policy in pdf document
2. Calendar
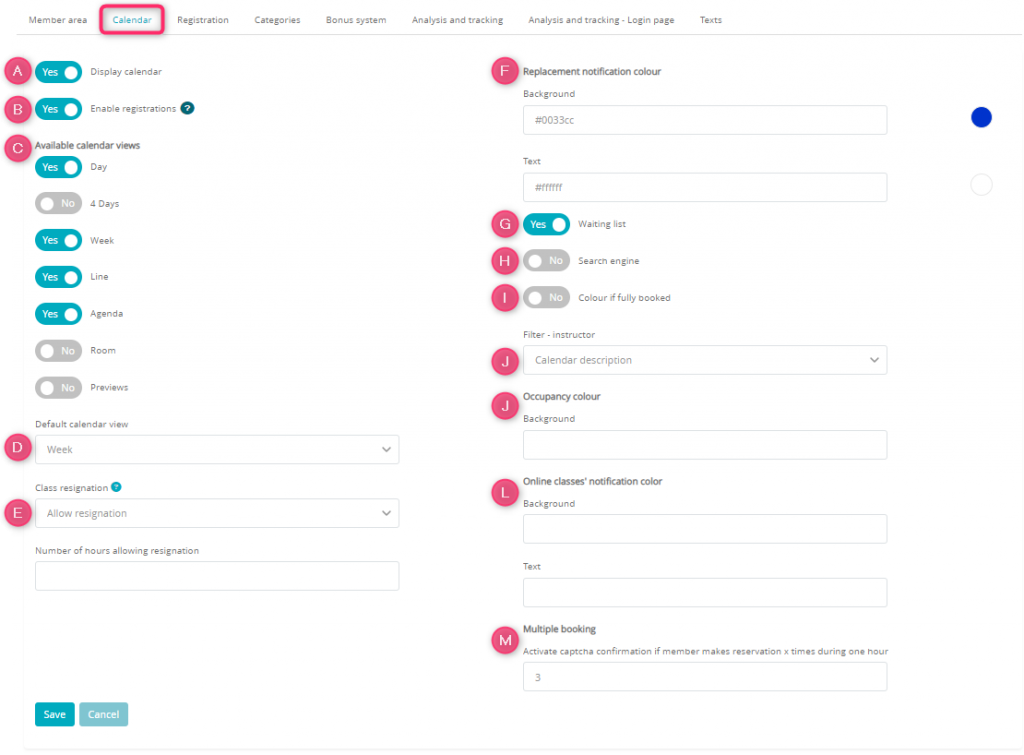
A) Display calendar slider– allows you to display the “Timetable” tab in the Member area
B) Enable registrations slider – allows your Members to sign in for the classes through Member area
C) Available calendar views – choose, how your calendar will be displayed in the Member area. You can choose up to 4 views:
– Day – single day view
– 4 Days – 4 following days will be displayed, breaks between classes will be shown
– Week – whole week will be displayed (with breaks between classes)
– Line – whole week will be displayed (without breaks between classes)
– Agenda – classes are displayed as a list
– Room – single day view, where the classes are divided between rooms assigned to them
– Previews – classes are displayed as a list; only classes starting in the future are visible here
D) Default calendar view – choose one of the views from the list, which will be the default one (calendar will be displayed in this view after entering the Timetable tab)
E) Class resignation – define, if your Members can cancel their enrollments for the classes. If you choose “Allow resignation but not later than defined point in time (number of hours before class starts)“, then you should also fill in the field “Number of hours allowing resignation”
F) Replacement notification color – choose the colour of the bar, which will be displayed on the classes, where the assigned instructor has changed
G) Waiting list slider – if you mark this slider as “Yes”, your Members will be able to sing in on waiting list
H) Search engine slider – allows searching for the classes in the whole club network (only for clubs in network)
I) Colour if fully booked slider – an information about free spots for the classes will be visible without the need to be logged in. If your classes’ tile changes its colour, when its fully booked, it will also change its colour for the members not logged in
J) Filter – instructor– you can enable the possibility to search for the instructor based on his/her name in the calendar or by the first and second name
K) Occupancy colour – the colour of the classes tile can be automatically changed to the selected one, when the main and the waiting list will be fully booked
L) Online classes’ notification colour – you can choose the colour of the bar, displayed for the online classes
M) Multiple booking – enable captcha confirmation, if your Members try to sign in for the classes multiple times in a short period of time
3. Registration
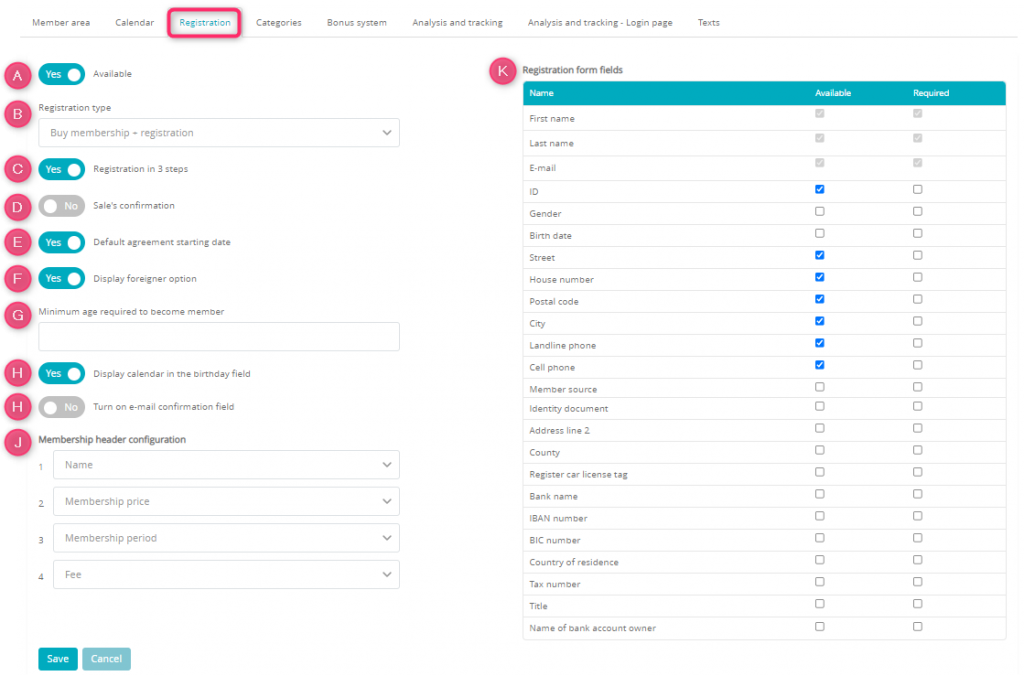
A) Available – enables the Registration/Buy a membership tab in Member area
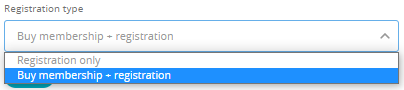
B) Registration type – choose “Registration only”, if you won’t be selling your memberships online or choose “Buy membership + Registration”, which will allow your Members to register themselves and to purchase a membership simultaneously:
C) Registration in 3 steps slider – mark the slider as “Yes”, in order to enable a quicker registration (step 1. Choose membership; step 2. Registration; step 3. Payment). The calendar, where your Members can choose the membership starting date, will be visible in the step 1. If you are using memberships categories – this slider should be marked as “No”
D) Sale’s confirmation slider – mark the slider as “Yes” if you want to display an additional step with the purchase confirmation
E) Default agreement starting date slider – if this slider will be set as “Yes”, newly bought membership starting dates will be set for the present day. If you leave this slider marked as “No”, your Member will have to choose the starting date manually
F) Display foreigner option slider – if filling in the social security number, during the registration process, is obligatory, you can enable this option for the foreigners, which could not possess this number. In this case, the field for the security number will be grayed out and an additional field for the date of birth will be shown
G) Minimum age required to become member – you can set the minimum age required to register in your club (will be checked based on the date of birth)
H) Display calendar in the birthday field slider – an additional calendar will help your Members choosing their date of birth (if you set this slider as “no”, the date of birth will be entered manually)
I) Turn on e-mail confirmation field slider – your Member will have to enter e-mail address twice (in two fields, as a verification against typos)
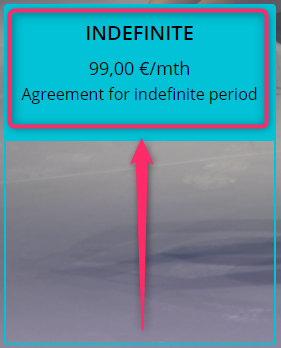
J) Membership header configuration – you can choose the order, in which information about memberships will be displayed in the Buy a membership tab:
K) Registration form fields – mark the checkboxes near the data, which will be obligatory (with a red star) to fill in during registration, or which data will be supplementary in this form. If the selected type of data has to be obligatory, you should mark its checkboxes in both columns (because it should be available, but also required). If you use the tax identification numbers (in polish: NIP) and you want these numbers to be printed on the receipts, you also should mark both checkboxes for the NIP.
4. Categories
Use the plus icon in the upper right corner, in order to create categories for memberships, which will help you to sort them on the Member area:

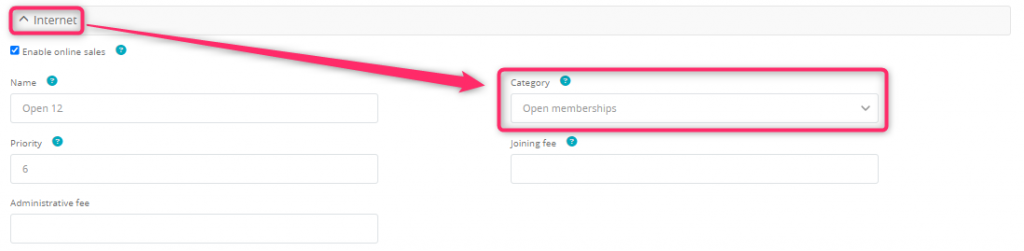
Next step is to assign your memberships to proper categories. In order to do so, move through Club/Chain settings -> Memberships -> Memberships -> pencil icon near the selected membership -> Internet tab -> assign this membership to one of the previously created categories:
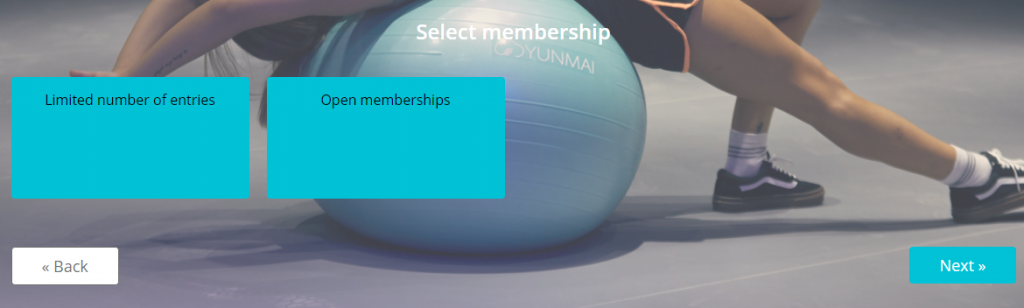
Memberships will be displayed in the selected categories in Member area:
Important! In order to display Categories in the Member area, the slider “Registration in 3 steps” should be marked as “No”.
5. Bonus system
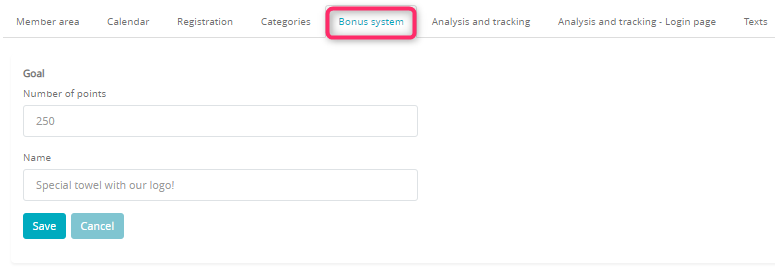
This tab will be displayed if the bonus system is turned on in your club. Here you can define a goal for your Members and the number of points required to receive the award.
6. Analysis and tracking
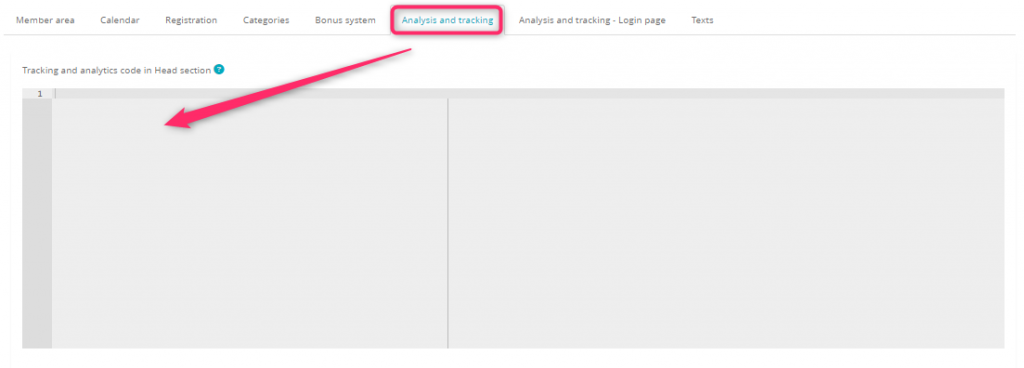
You can enter here special tracking codes, which will allow you to modify the graphic part of Member area. This section also allows you to enter codes, which will be tracking the behavior of your Members on the site. You can write these codes on your own or use help from the specialist.
7. Analysis and tracking – Login page
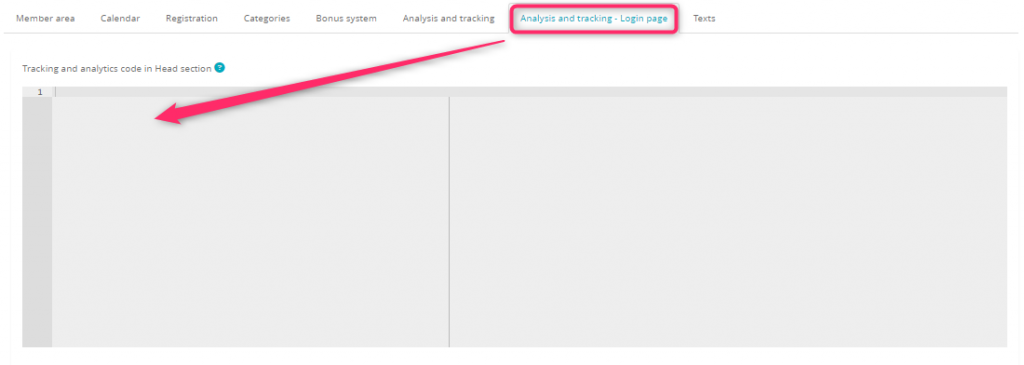
You can enter here special tracking codes, which will allow you to modify the graphic part of the login page (in Member area). This section also allows you to enter codes, which will be tracking the behavior of your Members on the login page. You can write these codes on your own or use help from the specialist.
8. Texts

Here you can enter additional messages for your Members, which can be displayed in the following places:
A) Timetable – enter the text over or under the calendar

B) Registration – you can display additional information over the memberships view, after the successful registration or under the consents
C) Membership – you can describe the rules of your bonus system, training sheets; you can also display additional information after the successful registration or the unsuccessful payment on the sales kiosk (if you have them in your club)