In this article you will learn, what types of CRM tasks are available in the eFitness system and how to add them. A CRM task can be added for you or for your employee. You can also add CRM tasks in bulk or automate this process.
Creating a single task
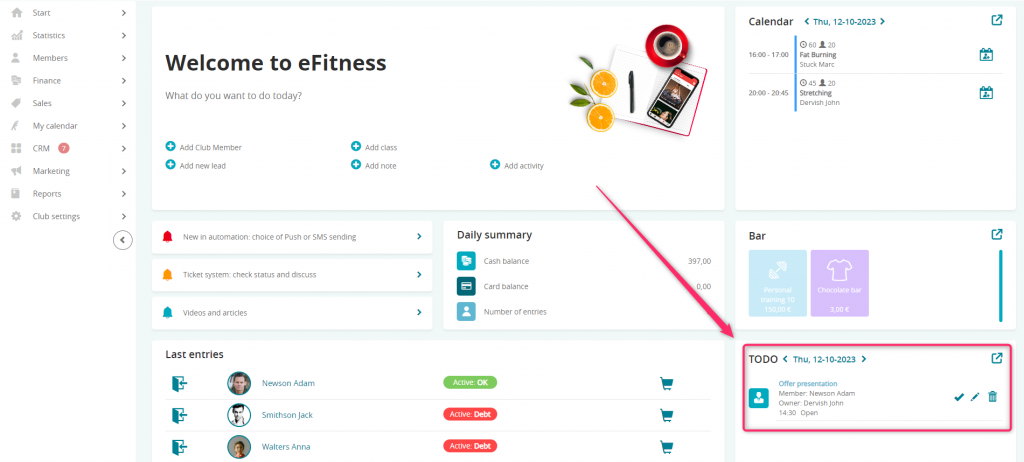
1. First way of adding a CRM task is doing so through the Starting page. To do so, go to the Start -> Dashboad -> TODO tab:
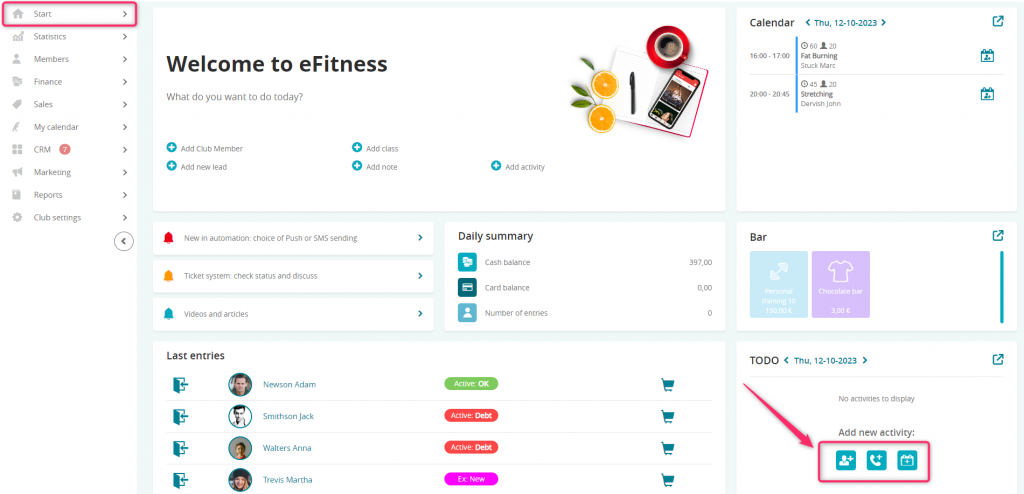
Adding a CRM task is possible only when there are no scheduled tasks visible on the list.
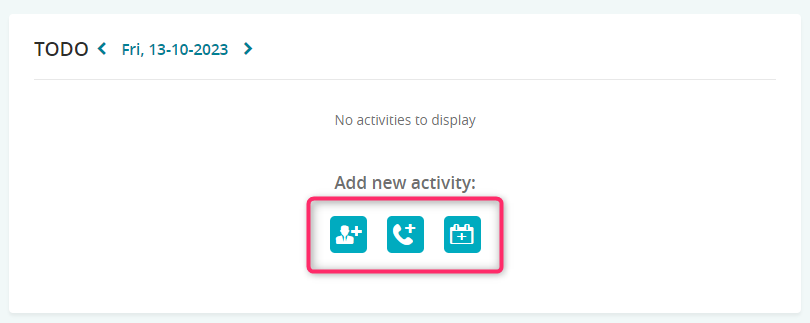
A list of tasks that are planned for the selected day will be shown. It is possible to switch between different dates using the arrow icons.
To add CRM tasks you can use one of the icons presented below:
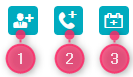
- Add: Meeting (1)
- Add: Phone (2)
- Add: Task (3)
After clicking the icon, a form will be displayed:
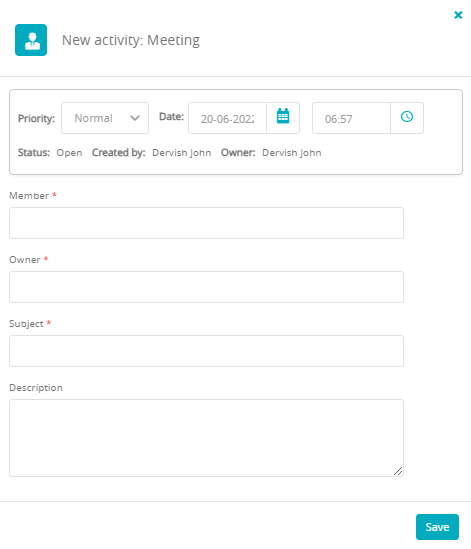
Prirority – normal by default, but can be changed to High, which will display an exclamation mark  next to the task
Date and time – date and time of the meeting/phone/task deadline
Member – choose a member, for whom the phone call/meeting/task will be scheduled
Owner – choose an employee responsible for the task’s completion
Subject and Description – topic and description of the task – for example, what is the purpose of this task
When the form has been filled out, save the changes.
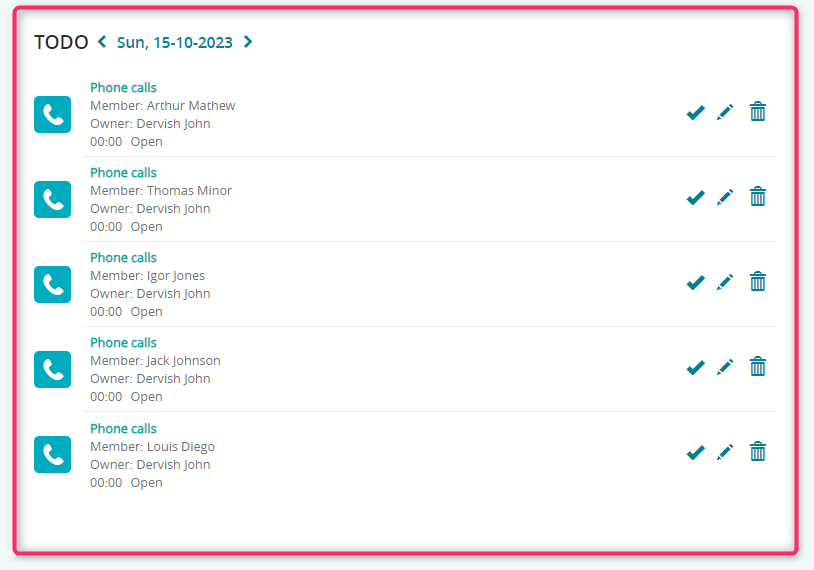
After adding the task, it will be displayed on the TODO list:
From here, we can choose to close the task with ![]() icon, edit it with
icon, edit it with ![]() icon or delete it with
icon or delete it with ![]() icon.
icon.
2. Second way of adding a CRM task is through the Member/Lead profile. To do so, go to CRM tab on Member’s profile:
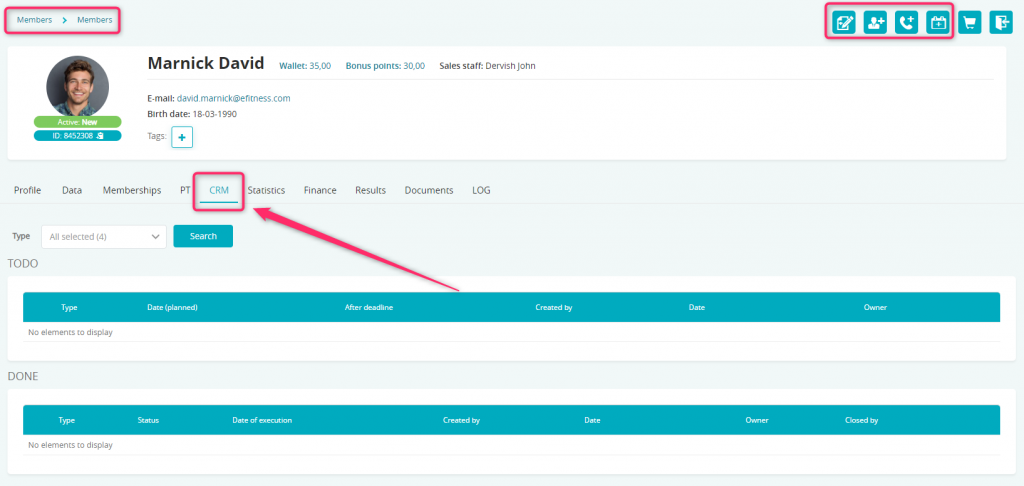
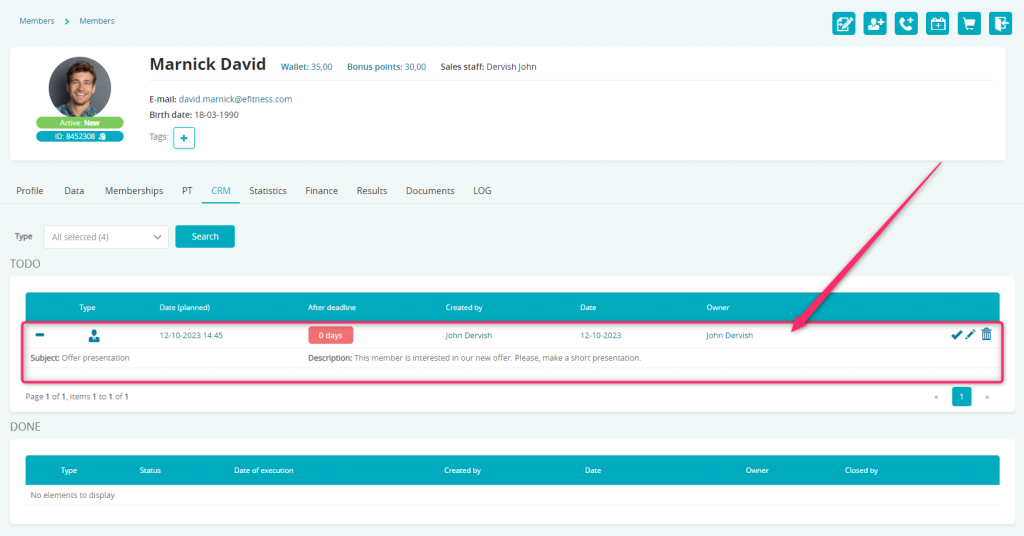
Here, the icons that allow you to schedule a meeting, a phone call or a task will be displayed. After the task is created, it will be shown on the TODO list:
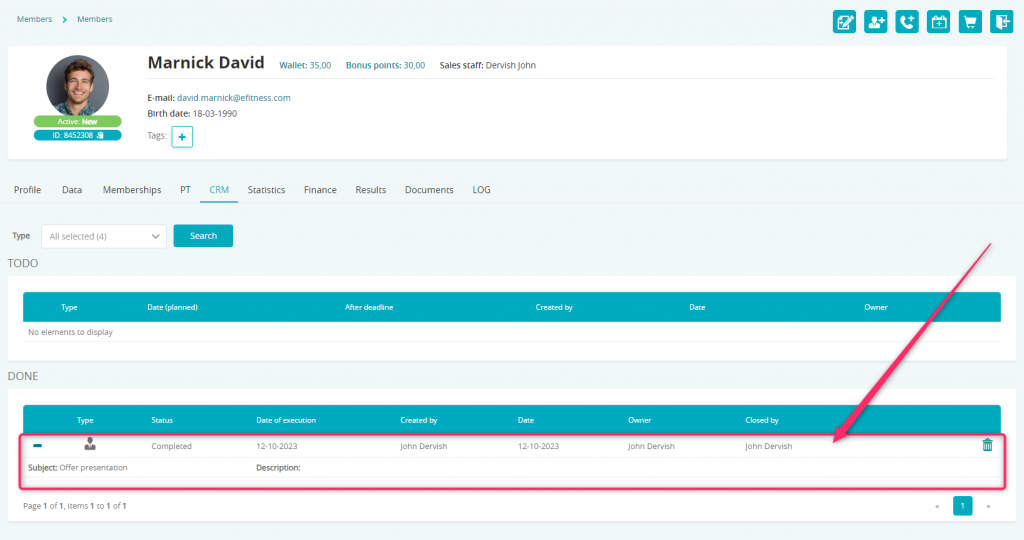
After completing the task, it will be moved to the DONE tab:
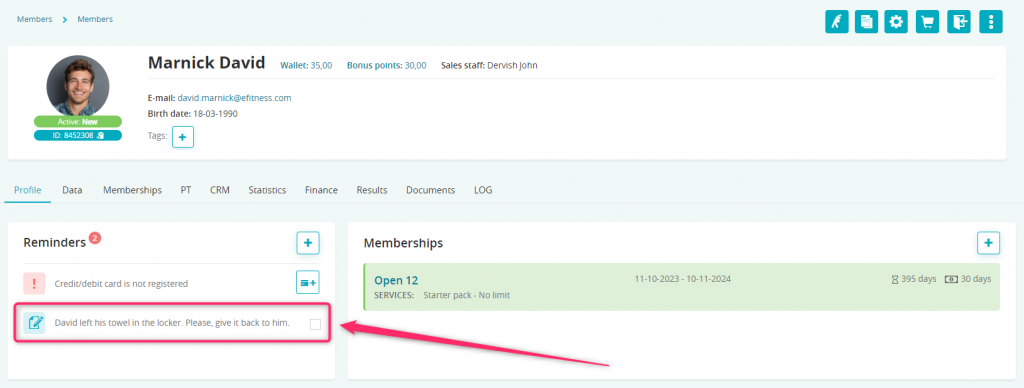
On this screen, you can also add a note to the member’s profile:
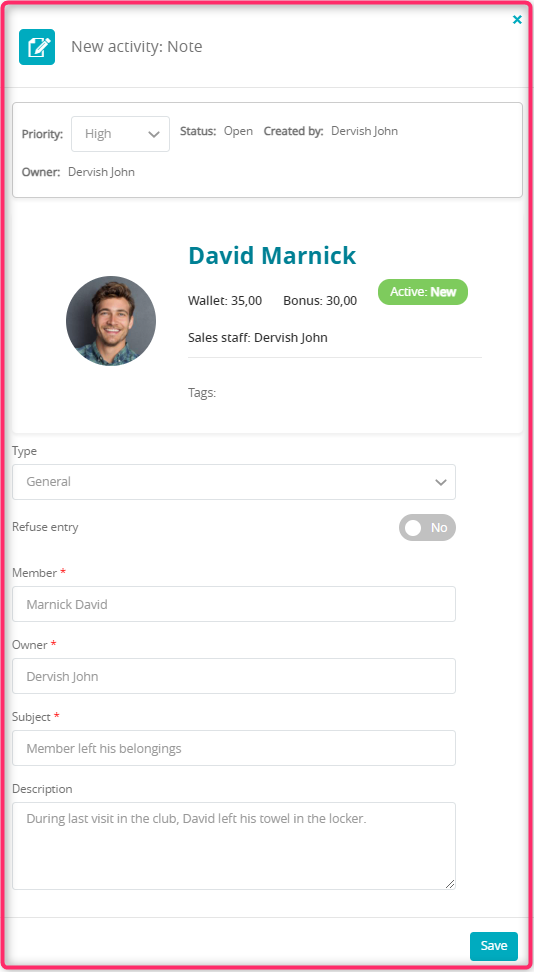
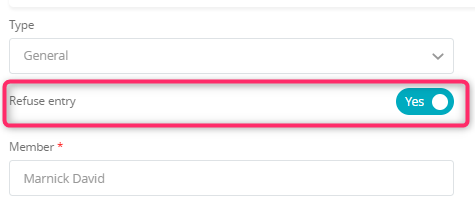
A Note can block Member’s access to the Club, if the Refuse entry slider is set to Yes:
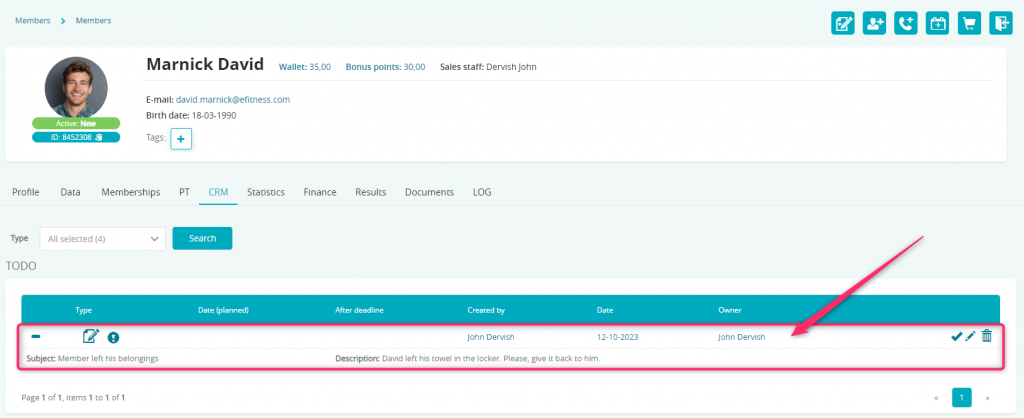
A note will be displayed in CRM -> TODO tab on Member’s profile by default:
The note will also be visible on the entry page, in the Reminders part:
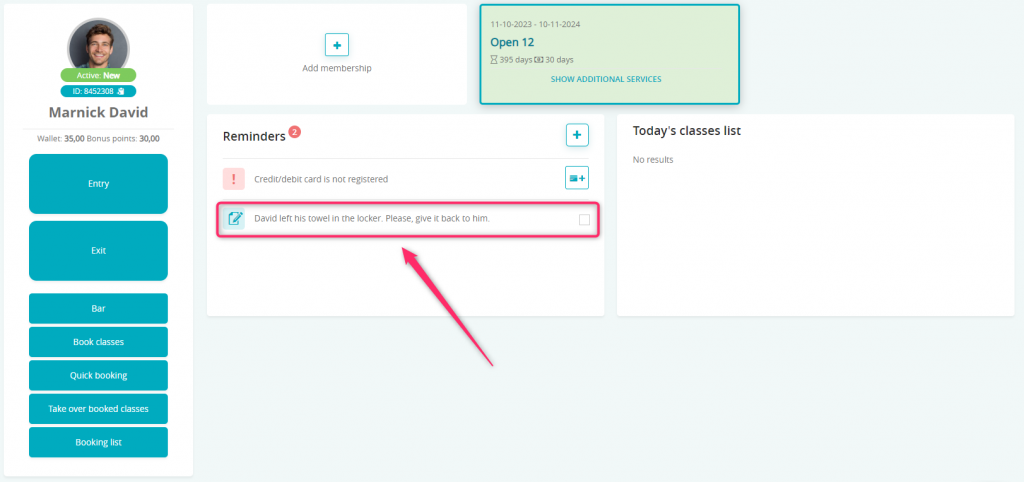
And on the member’s profile:
3. Another way of adding a CRM task is to move to the main CRM tab, where in the upper right corner you will find icons that allow to create a task:
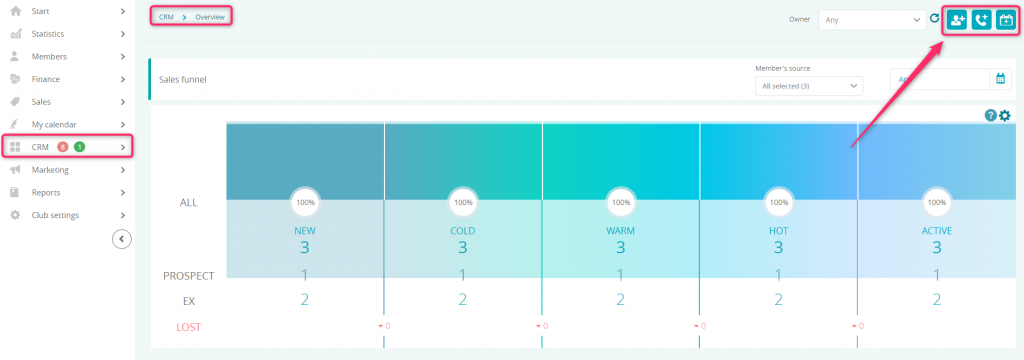
In the Overview tab you can also access the TODO list, where you can add tasks, if none is already active:
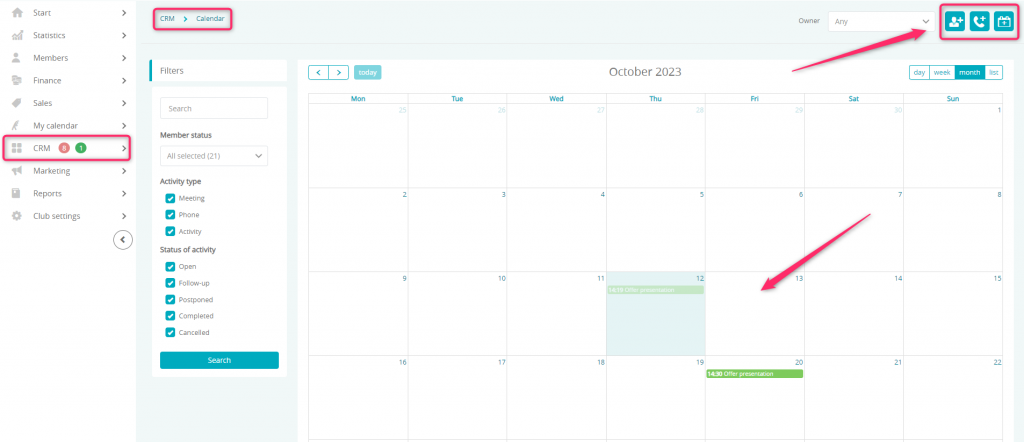
4. In the CRM -> Calendar tab, a task can be added after clicking on an empty field or using the icons from the upper right corner:
5. Each employee assigned to a Member/Lead can gather their own Client base, and manage it in CRM -> Members tab:

Mass task creation
You can add many tasks at once thanks to reports available in the system.
For example, let’s search for members who, during the last 3 months, have visited our club less than 3 times. Next, we will add a CRM phone call task in bulk.
In order to do so, switch to the Reports -> Members -> Activity report, select proper time period and a maximum number of entries. When the searching results will be displayed, click on the “Additional options” button and choose the “Add task to selected/all members” option:
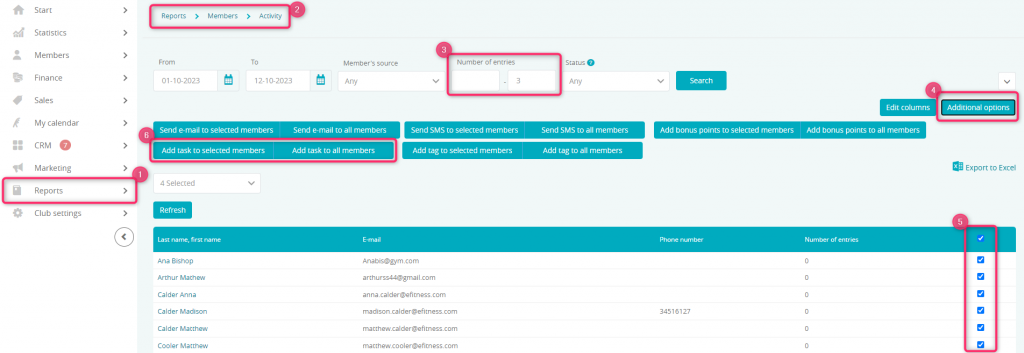
In order to add a task to the selected members, it is required to previously mark the checkboxes on the right side, on the searching results list.
A form of that allows us to create a CRM task will be displayed:
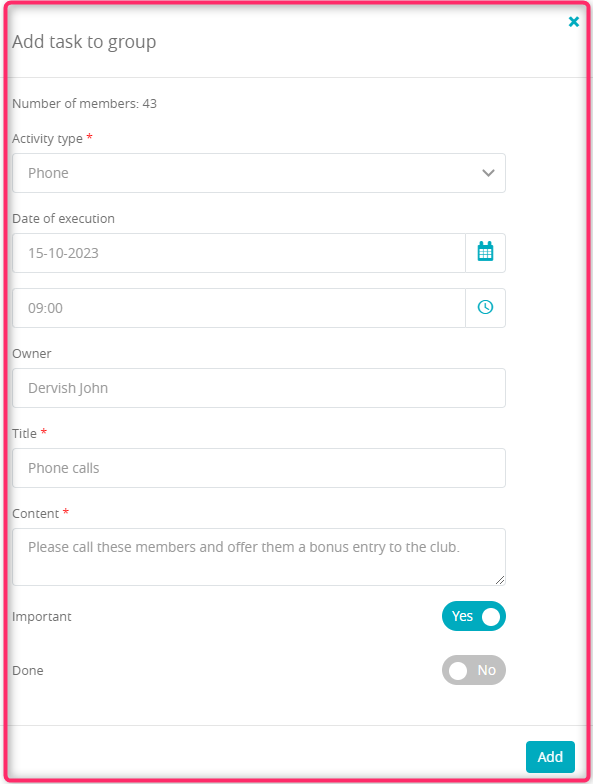
After clicking the Add button, tasks will be assigned to the chosen employee:
Automated task creation
A CRM task can be added automatically though the system.
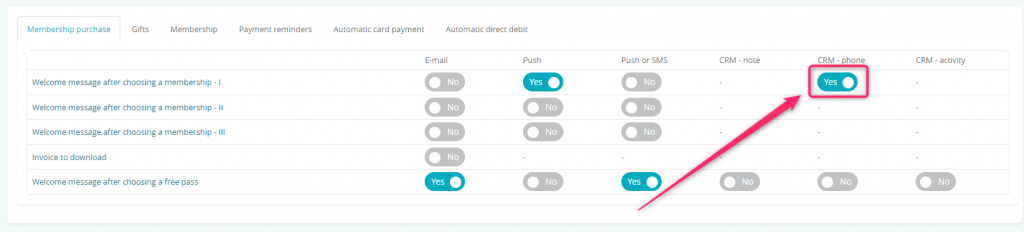
Go to the Club settings -> Automation -> Intended automation group -> Intended action in the system. Afterwards, you will be forwarded to the settings, where you can choose the type of a task that is supposed to be added:
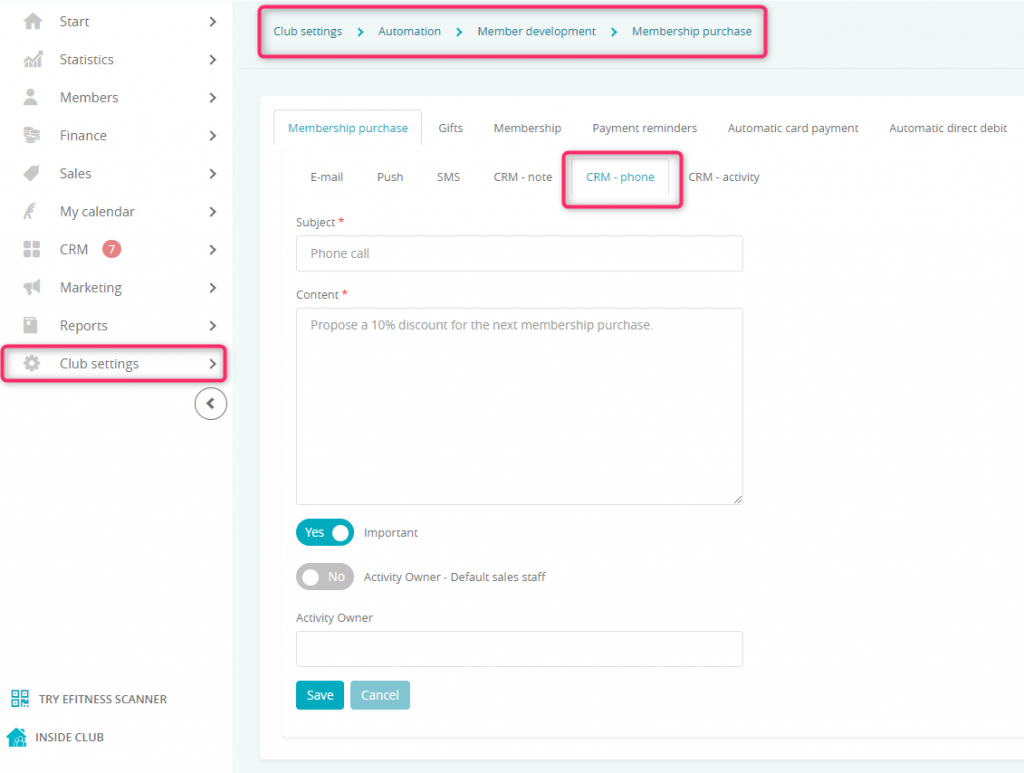
Fields below should be filled in:
Subject – insert subject of the task
Content – insert any clues for your employee
Activity owner – insert an employee that will be responsible for the tasks.
You can also simply check the Activity owner – Default sales staff slider, to assign the default employee that is associated with the member.
After saving the changes, please bear in mind that proper slider of the CRM task should be marked as “Yes”: